It's important to maintain your database of custom fields within Membrain, and ensure that they are named well for proper usage, kept up to date with current information, and old custom fields no longer in use are deleted or archived accordingly.
This is all done by an administrator by going to:
- System Setup.
- Scroll down to find Custom Fields.
- Select the custom field you want to work with from the list:
Process (covering Prospect, Sales Project, Ticket and Account Growth Project), Company, Contact, Activity, Content Hub, or Users.
Process Custom Fields
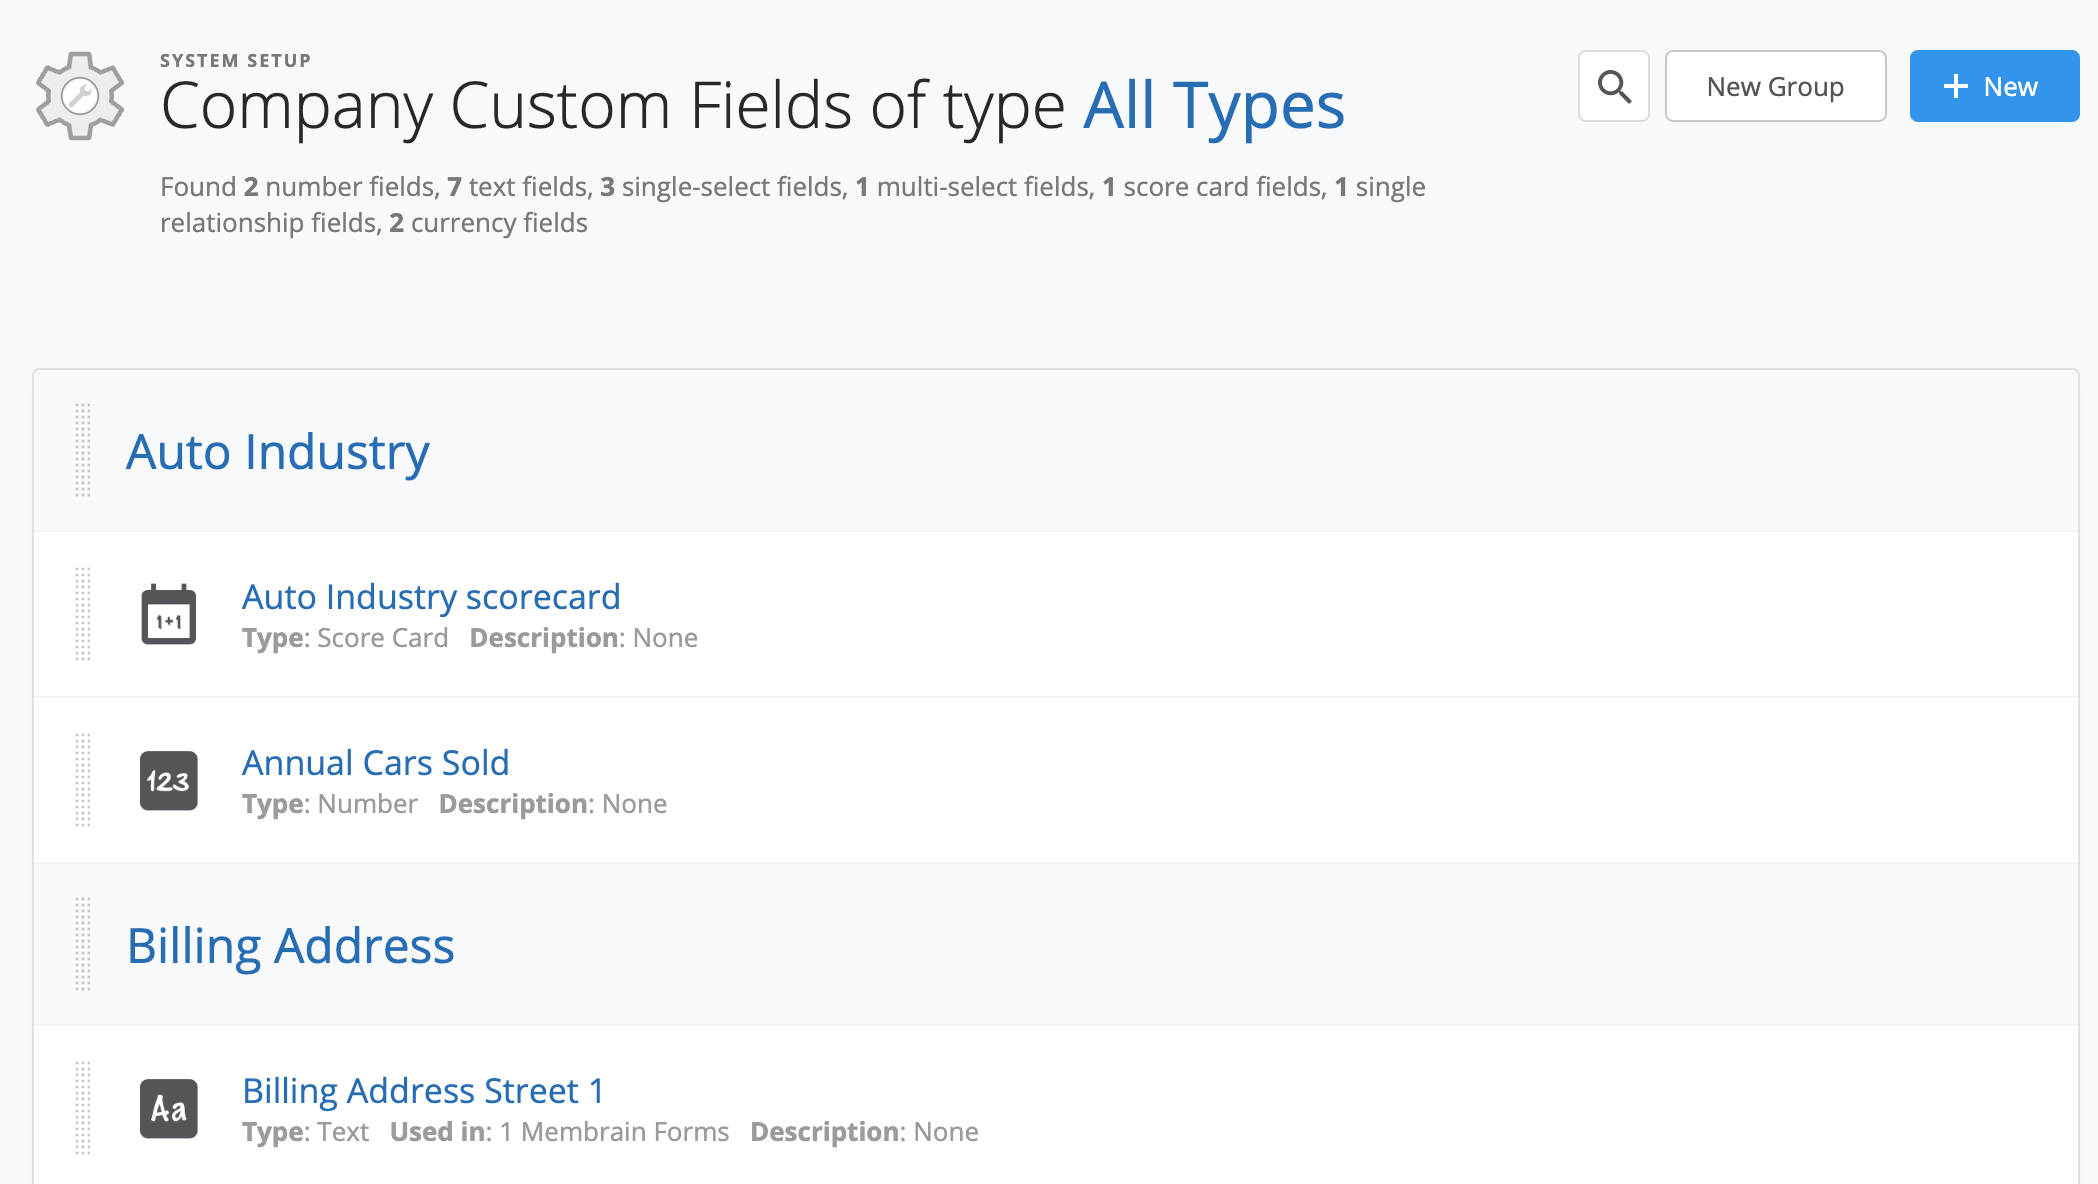
To make working with Process level custom fields easier, it is possible to sort or filter your custom field list and break them down into subcategories.

Use the quick filters at the top of the page to see custom fields for:
- Only Sales Processes
- Only Prospecting Processes
- Only Account Growth Processes
- Specific Process Name
- Unused Custom Fields
- Choose which TYPE of custom field you would like to see
Company & Contact Custom Fields
You can use Groups to change the layout of your Company and Contact pages, configuring them to suit the information you want to show on these pages.
Add a Custom Field Group
- From the Company or Contact page, click on the New Group button at the top Right.

- Name the new group and optionally add conditions to determine when this group will appear learn more in the section below.
- The new group appears at the top of the page.
- You can use the handle to the left of both the custom fields and the groups to drag and drop them around the page and position them exactly where you would like them to appear on the Company and Contact pages.
Conditions for Company & Contact Custom Field Groups
In addition to creating groups for Company and Contact custom fields, Membrain allows you to add conditions to a Custom Field Group. This feature enhances the visibility control of these groups on Company and Contact pages.
For Company and Contact related custom fields, you can set conditions based on:
- Labels
- Country
- Custom Fields
- User
- User Team
These conditions ensure that the Custom Field Group and all its included fields will only be visible on the Company or Contact page if the specified conditions are met. Enhance your user experience by displaying relevant information as needed, without affecting other views like Preview Hovers or List views.
Reposition Custom Fields
If you want to rearrange the positioning of the custom fields on your Company page or Contact page you can do so by dragging and dropping them to where you want them to be, using any groups you have created.
- Click on the handle icon
 to the left of the custom field or the custom field group.
- Drag it to where it should be and drop it.
Update a Custom Field
Keep the options available current and relevant in multi-select and single select lists by updating them, as required.
Perhaps you want to add, delete or archive options to a list, change the name or even customize the colors of the options. Follow these steps below to edit a current custom field.
- Go to System Setup - Custom Fields.
- Click on the subheading where the custom field you wish to edit belongs.
- Find the custom field you would like to edit, using the filters mentioned above if necessary.
- Click into it and make any changes required.
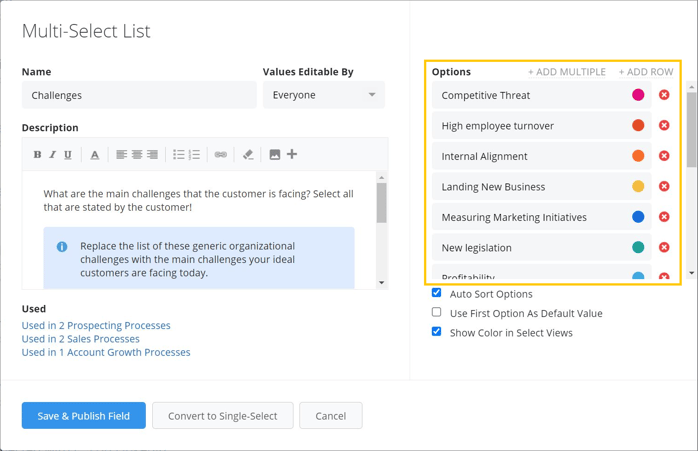
Change the name or add a description OR
Add some options in multi-select or single-select lists on the left-hand side.
Archive or delete options (archiving options keeps the historical data for reporting purposes, but removes the option from the list, so it can no longer be selected)
Click Add Row or Add Multiple to paste in a plain text list from notepad or excel.
- Click on the Save & Publish Field once you're happy with your updated list.
Delete a Custom Field
To delete a Custom Field:
- Go to System Setup - Custom Fields.
- Click on the subheading where the custom field you wish to delete belongs.
If the custom field IS NOT in use in any prospect, sales, account growth and/or ticket process, you will see a small
x icon on the right-hand side, indicating you can remove it.
Click on the
x icon to choose between two options
- Delete - this deletes the custom field. The field will no longer be visible in Membrain. Any data that may have been captured in the past in this field will also no longer be accessible.
- Archive - this removes the custom field from the list, so it is no longer visible in Membrain. However, if you have data captured in this field it will still be saved and visible inside a specific prospect, sales project, or account growth project, just as before the field was archived.
If the custom field IS in use in a prospect, sales, account growth and/or ticket process, the x icon will be greyed out. You will need to remove the custom field from all processes it is referenced in first, in order to be able to delete it as a custom field afterward.
Adding colors to Single & Multi-Select Fields
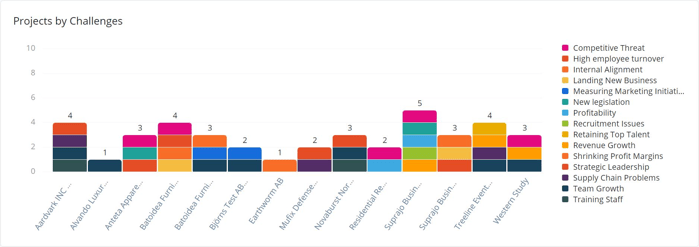
Single and Multi-Select Fields list options can be assigned specific colors. This can be helpful in Dashboards and Graphs where it's important that the colors of adjacent values are not too similar, especially for donut graphs or when segmenting column graphs. It can also make the list options more distinguishable in a list view or on a project page.
- Go to System Setup - Custom Fields.
- Click on the subheading where the custom field you wish to edit belongs.
- Find the custom field you would like to edit.
- Click into it and pick appropriate colors for the different options available.
- Choose if you want to show colors elsewhere in Membrain.

- Click on the Save & Publish Field once you're happy with your updated list.
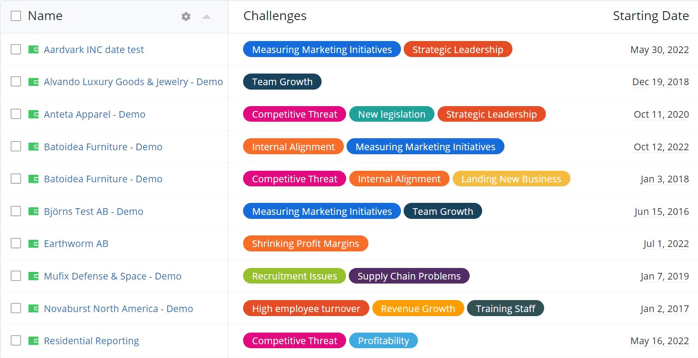
Note: If you opt to turn on “Show Color in Select Views” you will also see the colors represented in the different locations where the lists appear throughout Membrain, for example on a page of a Project, Company, or Contact and in all List views.
To learn more about the different types of Custom Fields available in Membrain, read the article Creating Custom Fields.


