As a Membrain and Oneflow User, this powerful tool will help you create and follow up on your Oneflow Agreements directly from Membrain.
The workflow with this integration is divided into four parts and requires that at least one of the Agreement signatories has access to the Oneflow Workspace.
- Create a Oneflow Agreement - Create an Agreement from a Prospect, Sales Project, or Account Growth Project.
- Send an Agreement - When the Agreement has been created in Membrain, you can fine-tune it and send it from your Oneflow Account.
- Status on the Agreement - Follow the status of the Agreement directly from Membrain, whether it's been sent, opened, or signed.
- Best Practices - Recommendations on how to maximize the value from this tool.
NOTE: If the Integration with Oneflow is not available in any of your processes yet and you want to set it up, please go to the article
Setting up the Oneflow Integration.Part I - Create a Oneflow Agreement
In the guide below, the Agreement is created from a Step in a Sales Project. However, it can also be used in Prospects and Account Growth Project if that is how the tool is set up in your organization's Membrain Account.
- Go to the Sales Project from which you want to create a Oneflow Agreement.
- Click on the Step that is designed to create the Agreement.
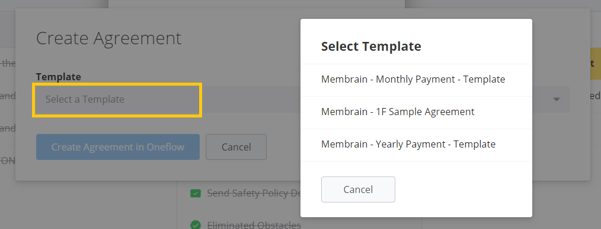
- To create a new Agreement, select Create.
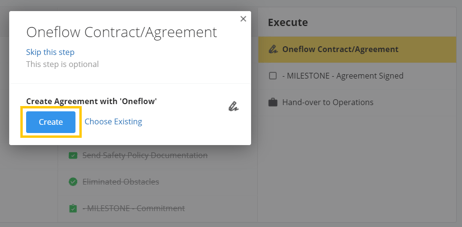
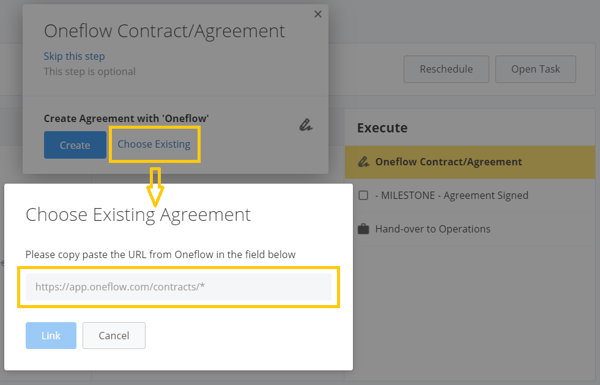
By selecting Choose Existing, you can link an Agreement that is already created in Oneflow to the step in Membrain.
- Select the Template you want to use. (The list of available templates is set up and added by a Membrain Admin)
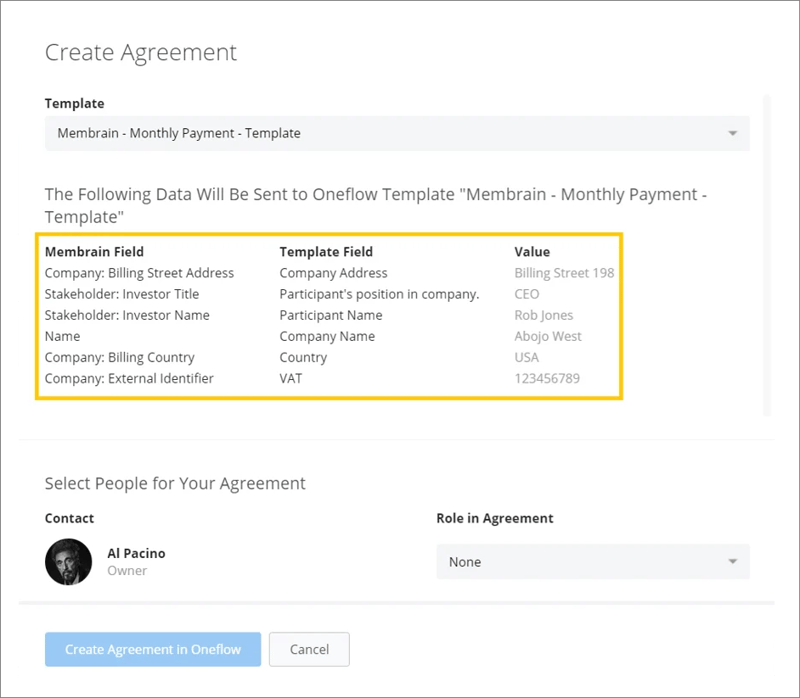
- Make sure the information you're sending to Oneflow when creating the Agreement is correct. If information is missing or if anything needs the be changed please cancel this dialog and add it to the Sales Project or the Company.
- Select Agreement Roles for everyone involved in the contract. The available contacts in this dialog are the Sales Project Owner and Stakeholders added to the Sales Project (External and/or Internal).
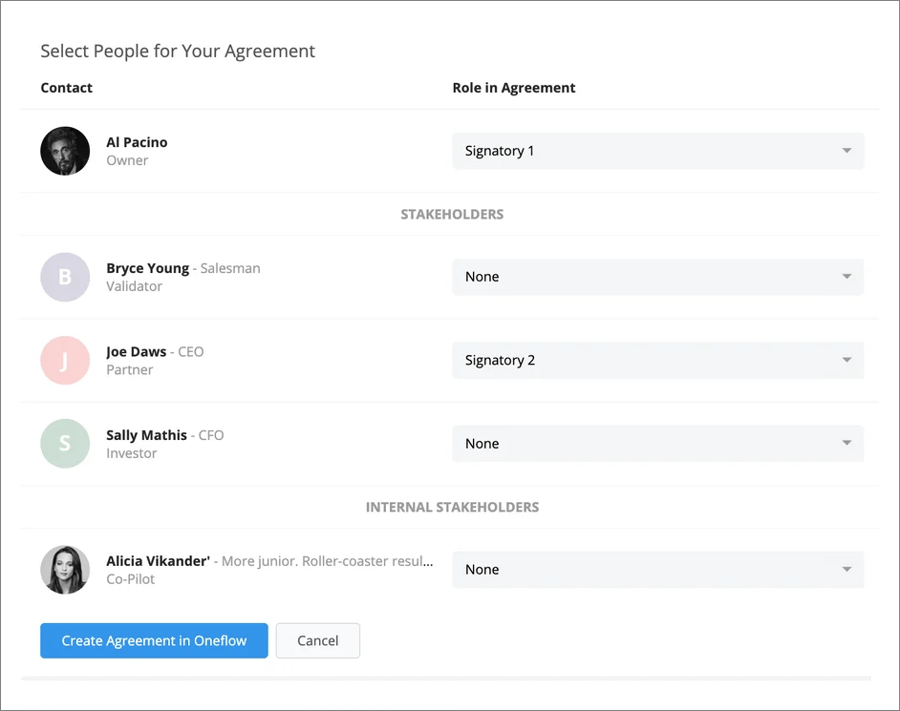
NOTE: The Agreement Roles Signatory 1 and Signatory 2 are required to select to create the Agreement. It would normally be someone from your Company and a Stakeholder from your counterparty.
- When all Agreement Roles have been assigned correctly, click on Create Agreement in Oneflow.

NOTE: To complete the creation of the Agreement, at least one of the signatories needs to have access to the Oneflow Workspace. Ideally, that would be the Sales Project Owner or for instance, an Internal Stakeholder that manages your Oneflow Agreements.
Part II - Send an Agreement
When the Agreement has been successfully created through Membrain, a new window in Oneflow will automatically open. If you're already logged in to Oneflow you will go straight to the Agreement.
It is from Oneflow that you are able to manage the Agreements you create in Membrain.
From the Agreement page in Oneflow you can make changes, and add or remove information to the Agreement. When everything is set and ready, you click send in the bottom left corner.
Part III - Status on the Agreement
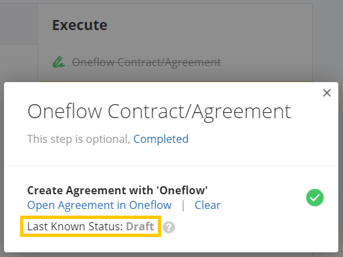
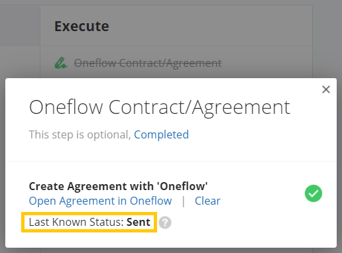
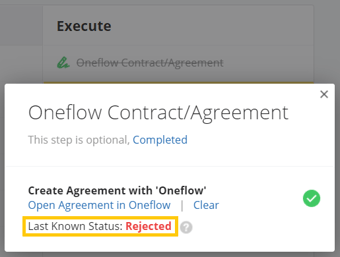
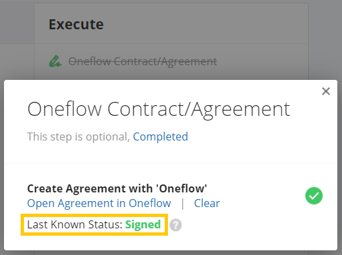
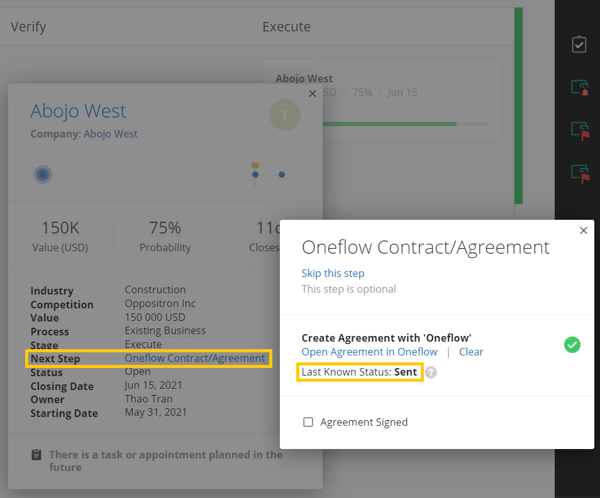
Even though you manage and send your Agreements in Oneflow, you will be able to follow the status in Membrain. By hovering or clicking on the Step where you created the Agreement, you can see the last known Status. The Status is provided by Oneflow and is updated as it is made available.
Statuses
The available statuses are:
- Draft - Agreement has been created from Membrain and appears as a Draft in Oneflow.
- Sent - Agreement has been successfully sent to the participants.
- Rejected - Agreement has been declined by a signatory.
- Signed - Signatories have signed the Agreement.
- Expired – The Agreement has passed its expiration date without being signed.

When an expired agreement is reactivated in Oneflow, Membrain automatically updates the agreement status to Sent and applies the new expiry date. This change is logged in the integration log.
Additional information on the Status
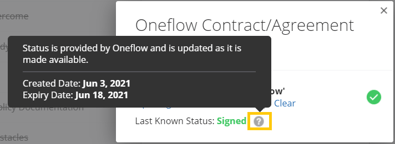
By hovering on the  icon beside the Status, you will get additional information such as the creation date and expiration date, which can help explain why an Agreement has moved to a specific status.
Notifications on contract progression
A browser notification, as well as a Membrain Guide alert, will pop up for OneFlow contracts/agreements that are in Draft/Sent status, when:

NOTE: Notifications will only be sent to the Prospect, Sales Project, or Account Growth Project's owner in question.
Part IV - Best Practices
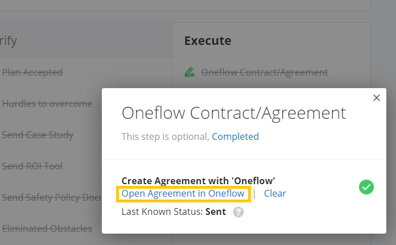
Open the Oneflow Agreement from Membrain
From this dialog shown below, you can open the Agreement in Oneflow, without having to manually open Oneflow, log in and find the Agreement from a separate tab or window in your browser. All you have to do is to click on 'Open Agreement in Oneflow' and you will go straight to the Agreement.
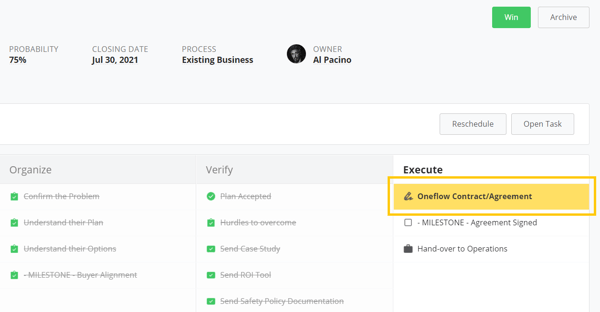
Agreement Status in your Active Pipeline
If the Step where you create the Agreement is set up to have more Details & Tools than just creating the Agreement, that means you won't complete the Step until you have completed all the tasks that come with it. In addition, this means that you can visualize the Agreement Status on your Sales Projects directly from the Active Pipeline.
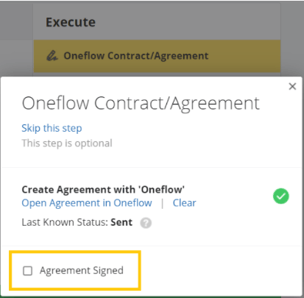
NOTE: Make sure a Membrain Admin has added at least one additional tool to the Step where you create the Agreement. This is configured in the
Process Editor and could for instance be a checkbox called "Agreement Signed".
This is how you can set up your Active Pipeline View and also how you easily visualize the Agreement Status:
- Go to the Active Pipeline
- Set up your View to Sort By: Next Step
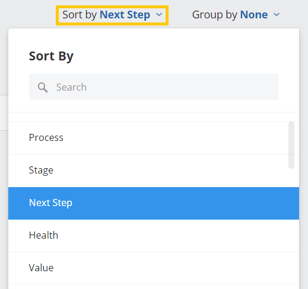
- Now you will see which Sales Projects have "Create Oneflow Agreement" as the Next Step altogether at the top of the Active Pipeline.
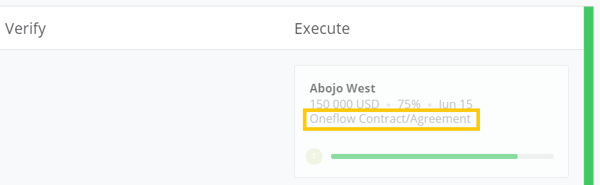
- Hover on the Sales Project and click on the Next Step and you will see the Status. You don't necessarily need to do the previous steps in this guide to be able to see the Next Step on hover.
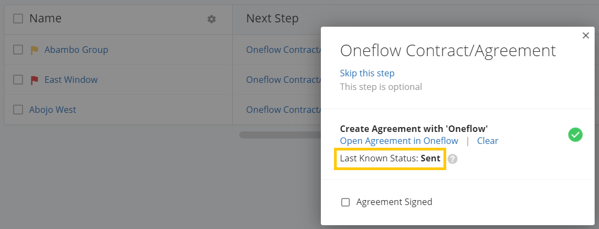
Agreement Status in a List View
Get an overview of all the Sales Projects that have Oneflow Contract/Agreement set as the Next Step and effectively be able to see the statuses of the Agreements.
From the Sales Project List View:
- Add the column Next Step.
- Filter your View to only show the Sales Projects that have Oneflow Contract/Agreement set as the Next Step.
- Save your View to easily be able to load whenever needed
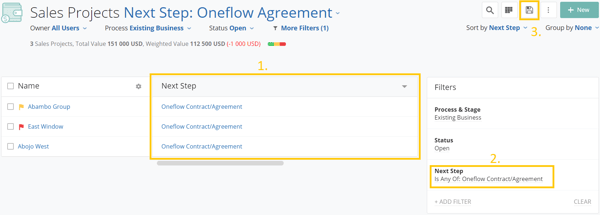
From this List View, you can now hover or click on the Next Step to see the Status.