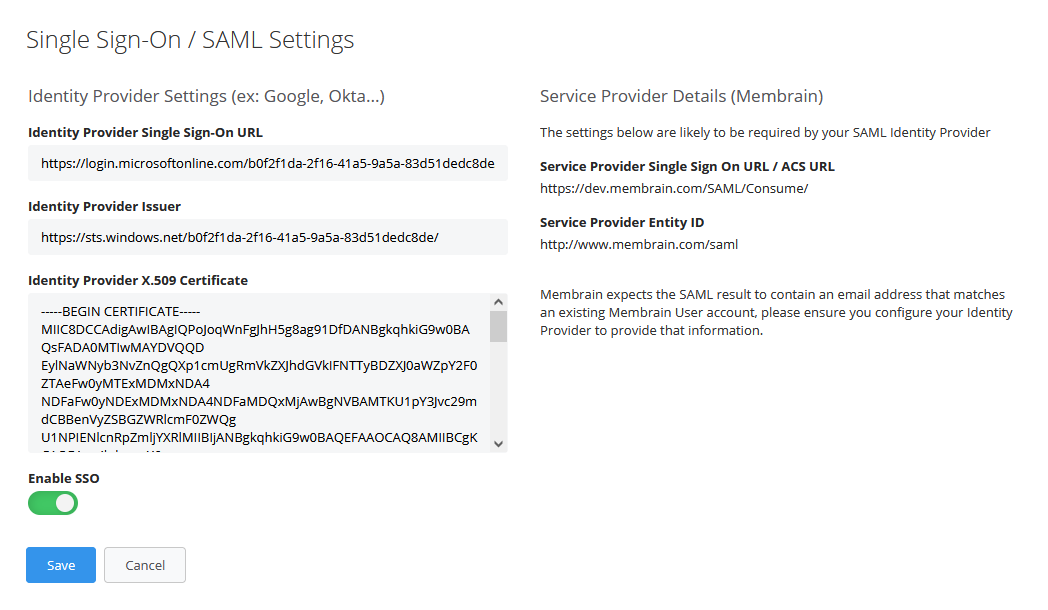
Single Sign-On / SAML Settings
Single Sign-On (SSO) is an identification system that allows you to log in to Membrain one time. This has significant advantages over logging in using a username/password: no need to type in credentials, no need to remember and renew passwords, no weak passwords, etc.
General Setup of SSO
As an Administrator, setting up SSO is pretty straightforward, however, it may get a little bit technical so if you're unsure of what to enter, you may need to reach out to somebody in your own IT department to help out.
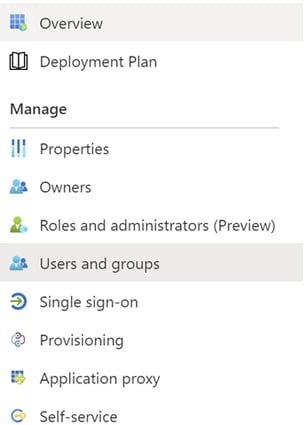
- Go to System Setup.
- Scroll down to Privacy & Security and click on Single Sign-On / SAML Settings.
- The SSO setup page will open. Fill in the information and Enable SSO.
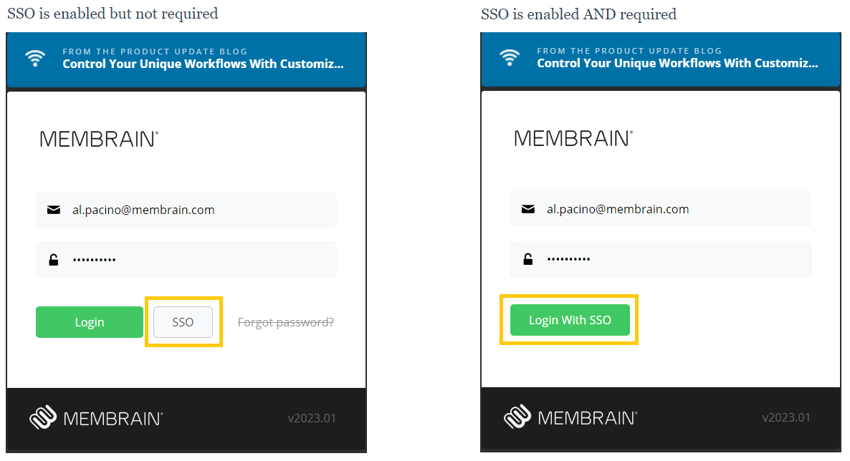
- You can also enable the option to require SSO, which means that only an SSO button will be available, and no normal login button will be present. This feature applies to both Membrain Go and Desktop.
If you have any questions or need assistance with setting up SSO on Membrain Go, please reach out to your IT department or Membrain support team.
Setup SSO With Microsoft Azure AD as The Identity Provider
If you use Office 365 and Microsoft Azure, follow the steps outlined below to use Microsoft Azure AD as the Identity Provider:
- Log in as an administrator in Azure Portal (https://portal.azure.com).
- Go to your Active Directory and click Enterprise Applications.
- Click New Applicate application (ex. “Membrain SSO”) and select Integrate any other application you don't find in the gallery (Non-gallery) and click Create.
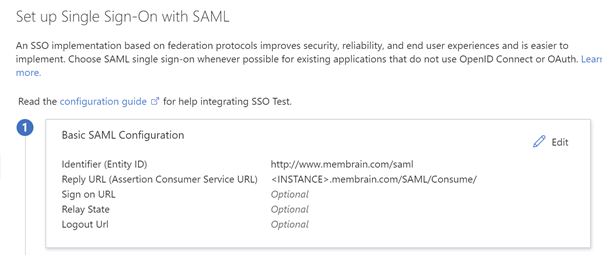
- Click Set up single sign-on card then select sign-on method SAML.
- Add the Identifier and Reply URL (these are found in the Single Sign-On / SAML Settings dialog in Membrain).
- Download the Certificate (Base64).

- Open the certificate in Notepad or other simple plain text editor and copy the entire text and paste it into the Identity Provider X.509 Certificate field in Membrain. (NOTE: Make sure no spaces or empty lines are copied before or after BEGIN CERTIFICATE and END CERTIFICATE)
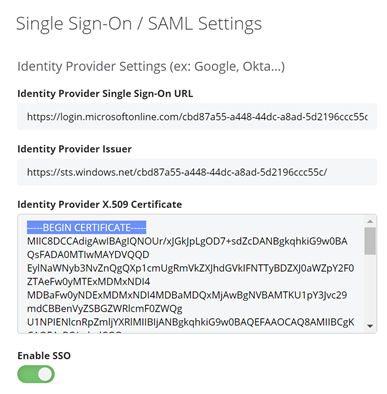
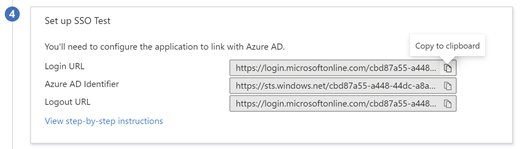
- Copy the Login URL and Azure AD Identifier into the Membrain fields Identity Provider Single Sign-On URL and Identity Provider Issuer respectively.
- Don’t forget to enable SSO in Membrain.
- In Azure, now just add the users you want to be able to use the SSO app and you are good to go.