Get started with setting up the integration between Membrain and DocuSign to enable this powerful tool that will help enable your team in their Sales efforts! Follow this guide and you'll be up and running in no time.
Before you start, ensure that you have access to your DocuSign account, as you will need to allow Membrain to authenticate to it during the setup process.
What This Integration Does
| Data Type |
Membrain →
DocuSign |
DocuSign →
Membrain |
Notes / Limitations |
| Companies |
Partial |
|
Information can only be pushed on Agreement creation. |
| Contacts |
Partial |
|
Information can only be pushed on Agreement creation. |
| Prospects |
Partial |
Partial |
Information can only be pushed on Agreement creation.
You can see updates to the DocuSign Agreement Status in Membrain. |
| Sales Projects |
Partial |
Partial |
Information can only be pushed on Agreement creation.
You can see updates to the DocuSign Agreement Status in Membrain. |
| Account Growth Projects |
Partial |
Partial |
Information can only be pushed on Agreement creation.
You can see updates to the DocuSign Agreement Status in Membrain. |
Step-by-step Guide
The integration is configured by a Membrain Administrator and can be broken down into four main parts outlined below:
- Create a template in DocuSign - that you will later use in the Membrain Integration.
- Activate the Integration - Authenticate.
- Add templates and map fields - Add Contract/Agreement Templates.
- Implementation - Add the tool to a Step in your Process.
- Statuses
This tool can be applied to a step in your Prospecting Process, Sales Process, and Account Growth Process.
Part I - Create a template in DocuSign
- Log in to DocuSign
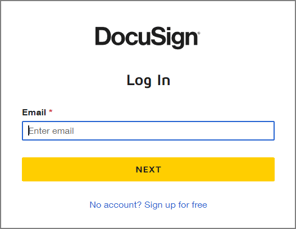
Note: If you don't have a DocuSign account, you can create one by starting a Free Trial.
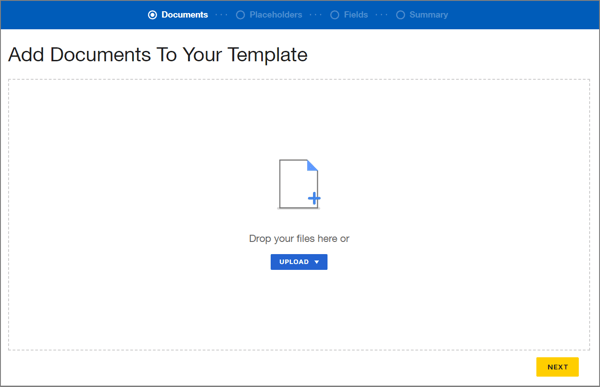
- Create a Template - When you're logged in to your DocuSign account, go to Templates > Create a Template > Upload and add a document (in PDF format). Then click Next.

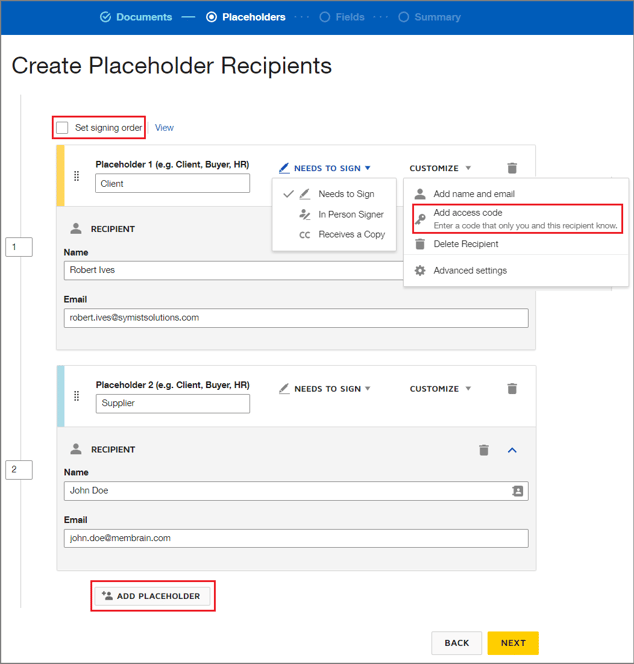
- Create Placeholder Recipients - Add the agreement parties' role, name, and email address and select if they need to sign, or if they only need to receive a copy of the agreement.
There's also an option for in-person signing to simplify the signing process when meeting in person with someone.
And, you can even add a passcode to ensure only authorized people access the agreement and set the order in which the agreement parties will sign.
When you're ready with filling in the above-mentioned information, click Next.
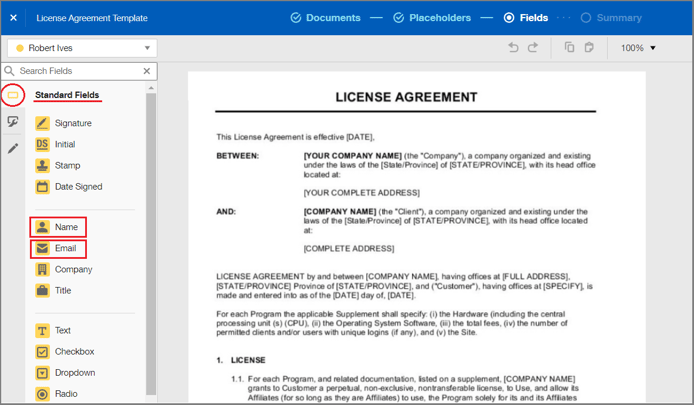
- Add fields to the Template - In this step, you can optionally add fields to your Template from a list of Standard Fields and even create your own Custom Fields for company, phone, etc. for each signer.
Drag and drop them into the agreement. Then click Next.
Important: The only fields from the Standard Fields list that work are Name and Email.
- Save the Template
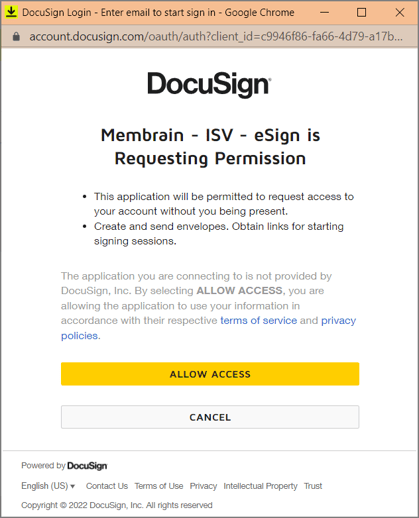
Part II - Activate the Integration
- Go to System Setup in Membrain, scroll down to the section Integrations, and select DocuSign.

- Go to Authentication and allow access.

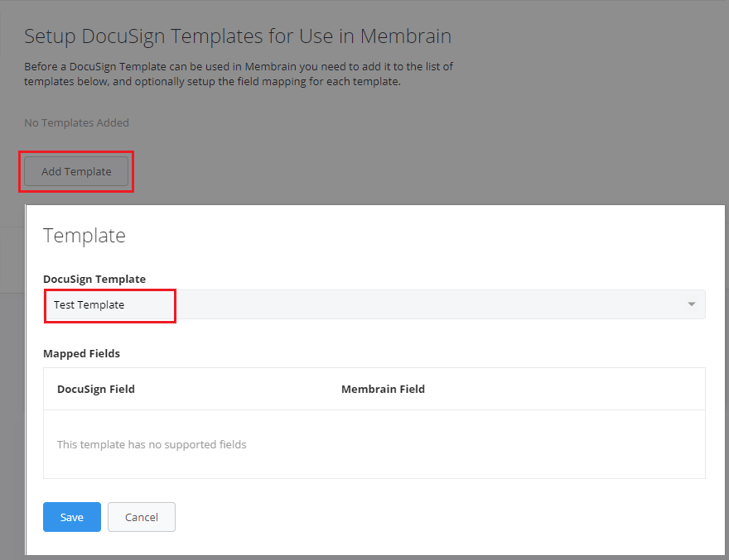
Part III - Add templates and map fields
Go to Templates, add your templates and Save. Map Fields, e.g. Sales Projects, Company, and Stakeholders fields.
Part IV - Implementation
If you are new to Membrain or need assistance in creating the process before adding the tool for creating agreements in DocuSign, please go to this article first.
When the activation and technical preparation of the integration is completed, it is time to implement this tool to a Process in Membrain.
In the guide below, the tool is added to a Sales Process. However, it can also be applied to Prospecting Processes and Account Growth Processes.
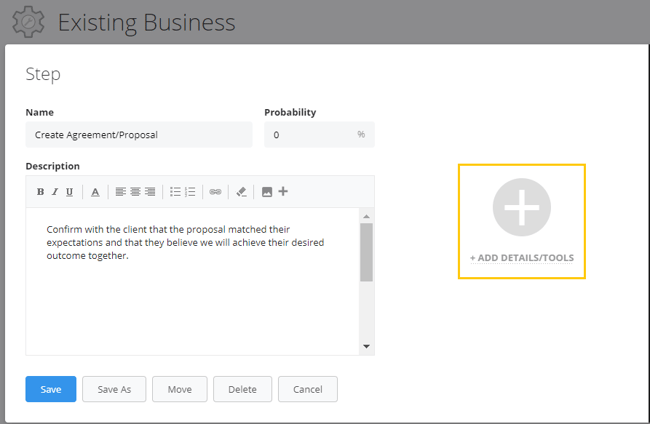
- Go to the Process editor of the Sales Process that you wish to add this tool to.
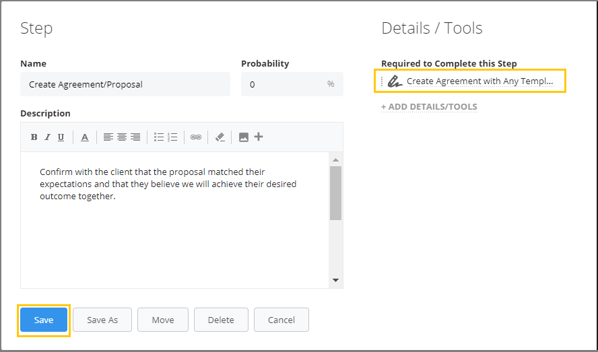
- Add a new Step or edit an existing Step.
- Click +ADD DETAILS/TOOLS.
- Select the tool Create Agreement.
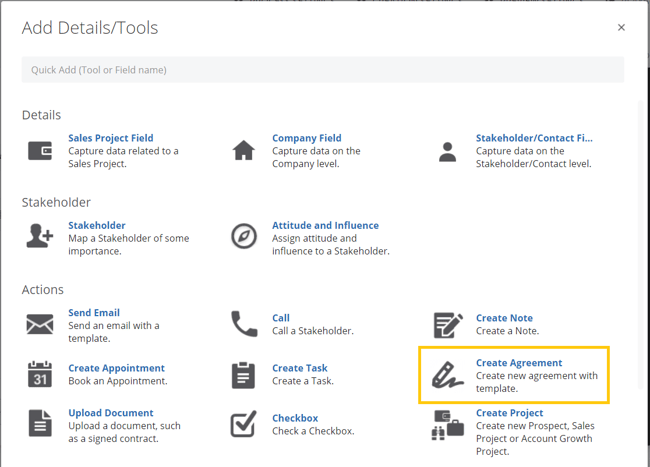
- In the field Service - Select DocuSign.
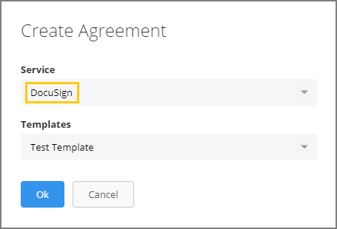
- In the field Templates - Select the DocuSign Template(s) you wish to be available in this Step in this Sales Process.
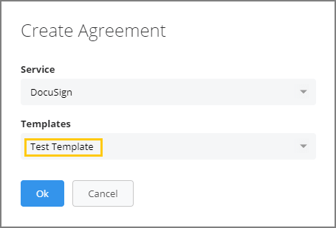
- Click Apply and then OK.
- When this Tool is added to your Step, Click Save.
When all parts and steps are completed the integration is active and ready to be launched to the team. Congratulations!
Part V - Statuses
- Status: Draft
Membrain creates the Agreement from the Step in the Process.
- Status: Sent
When you go to DocuSign and Send the Agreement to the signatories.
- Status: Signed or Retract
It takes a day before the status changes from Sent to Signed due to a delay on DocuSign's end.
TIP: Add a checkbox to the Agreement Step so that you can have the step as Next Step and see the Status of the Agreement (Draft, Sent, Retract, Signed).


