Popular Content
Membrain for:
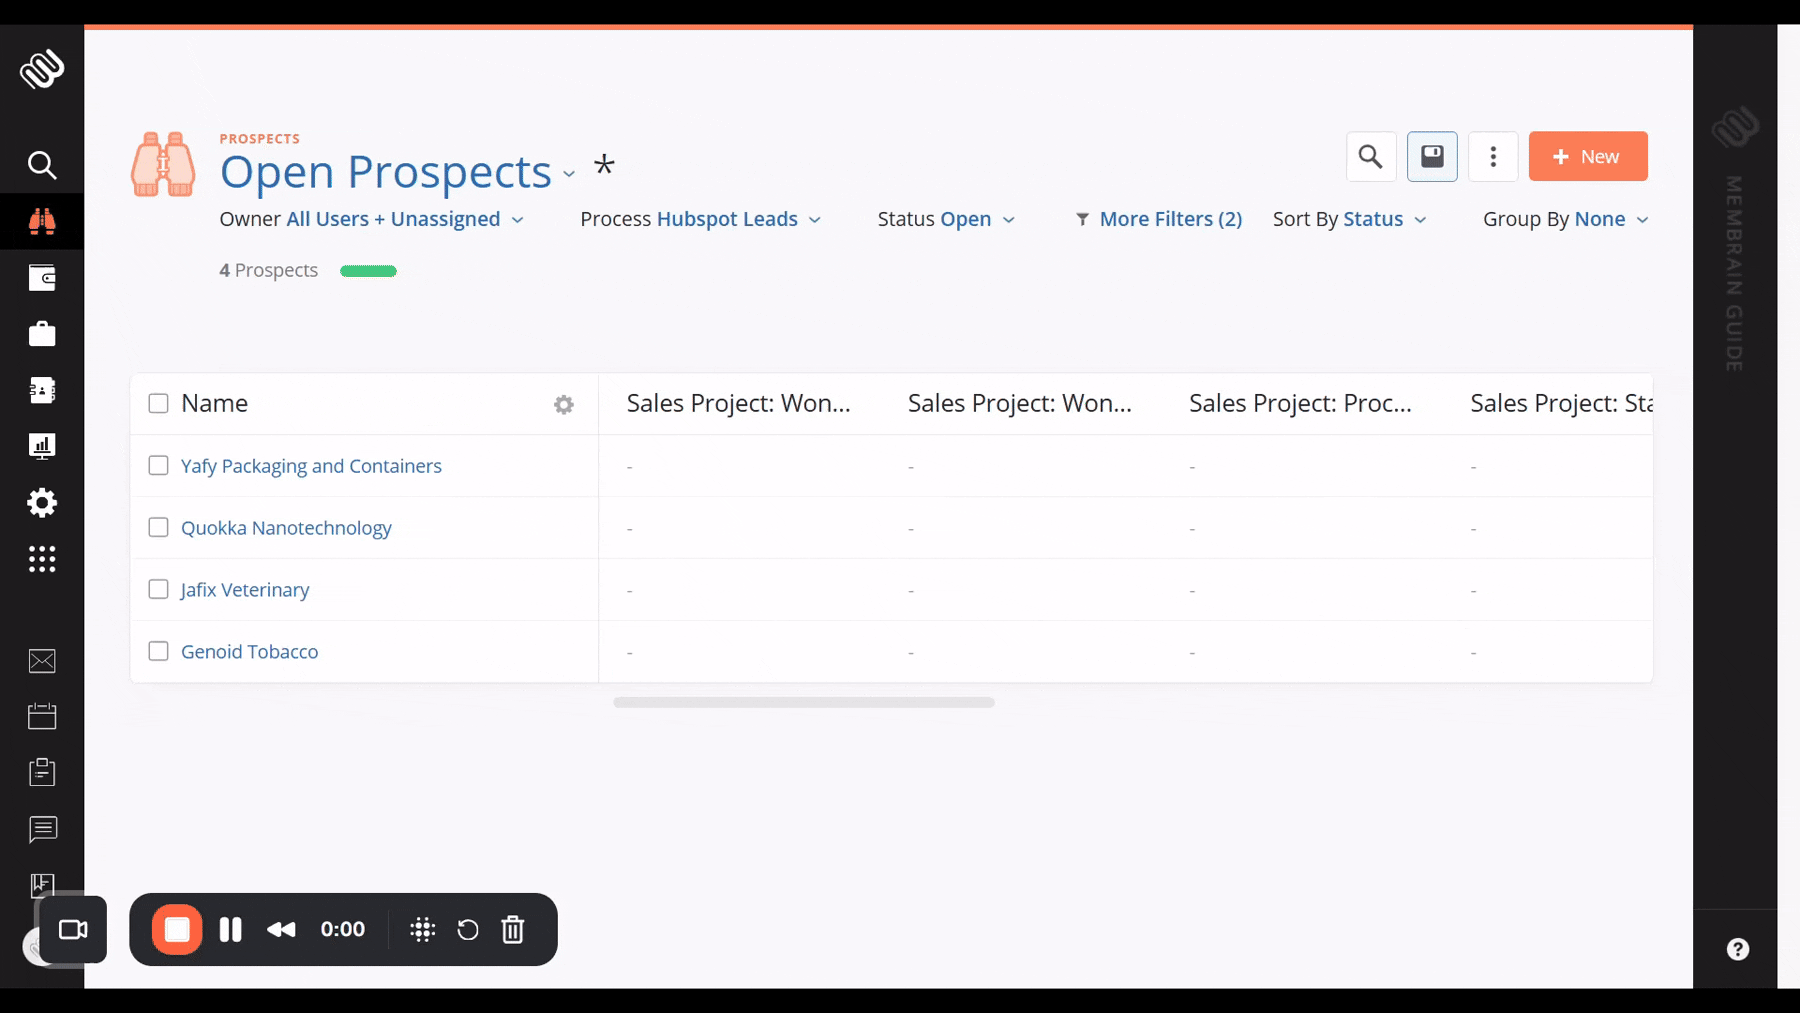
Before a prospective client is ready to enter your sales pipeline, it needs to be properly qualified. If not, there is a risk that your pipeline gets filled with opportunities unlikely to close, chewing up both valuable time and resources. Here to help you with this is Membrain's powerful Prospecting features.
You can set up different processes for different types of leads and prospects, with defined qualification criteria that need to be confirmed before the lead becomes a sales project. You can use these processes to segment between different lead sources (inbound, network events, outbound activities, social selling), different customer segments (product categories, new/existing business, industries) or something else completely.
This article takes you through creating a Prospecting Process with instructions for each step of the way. To simplify things, we suggest you break it down into 5 areas:
Membrain Administrators can import or create new Prospecting Processes from the System Setup area.
When creating a new Process, you will get three options:
Begin by choosing a name for your Process, add a Process Description and select which user should be allowed to edit it.
From the color picker icon to the right hand of the Process Name assign a color to your process, this will be shown in dashboards when choosing to segment by process.
Finally select which user is appointed to manage the process, this information will be displayed to your users so they know who to refer to.
The information you have provided is then previewed when hovering over the Process name inside each individual Prospect that uses this process.
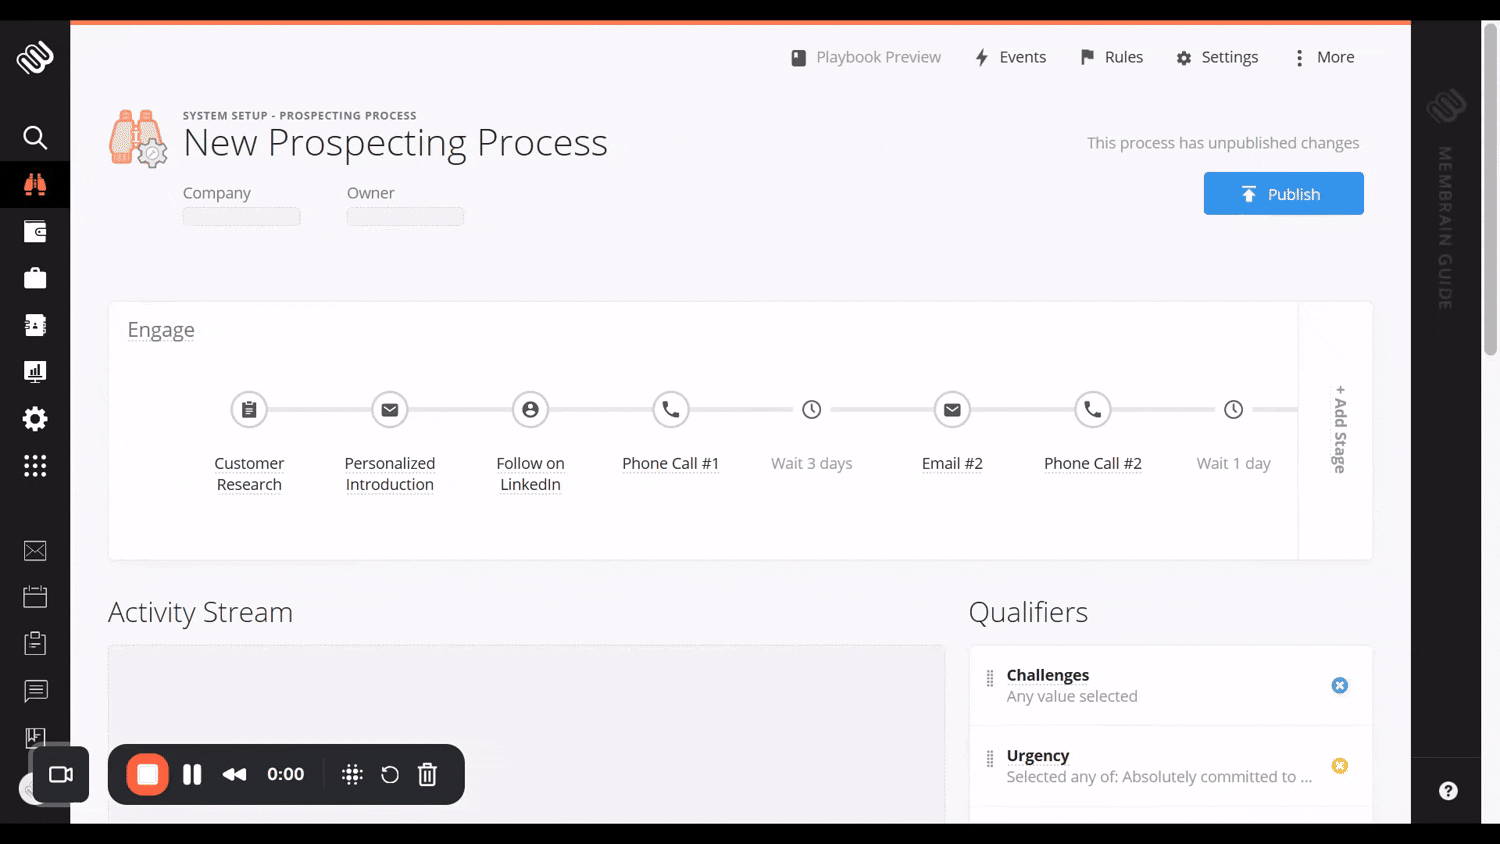
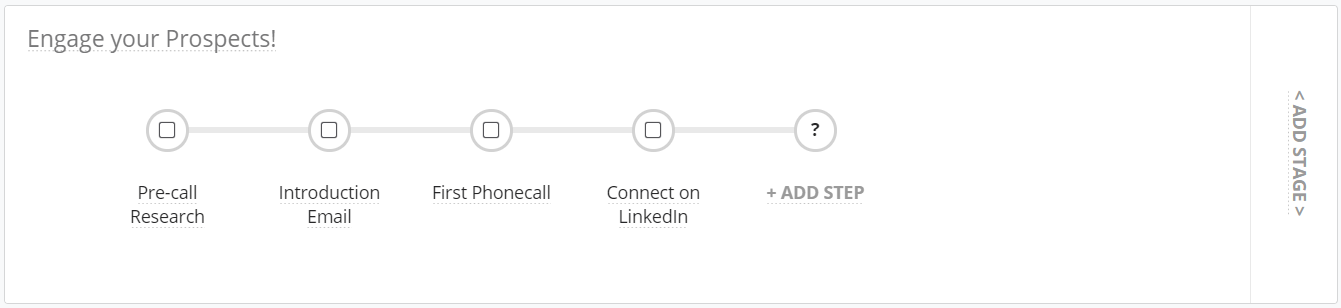
Begin by setting up the basics of your Process. Map out each step of your Process and break it down into stages, if necessary. Once you have a solid foundation that reflects your Process focus, you can then add more complex tools later on.
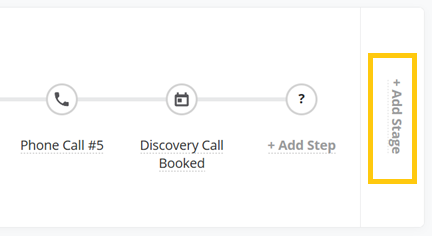
Add steps and stages to a Prospecting Process to help salespeople follow a workflow built specifically for a certain type of Prospect.

.gif?width=1200&height=675&name=add%20step%2c%20drag%20and%20drop%202%20(1).gif)
Wait steps are unique to the Prospecting Process, and allow you to add a cadence to your Process. Adding a delay between steps can help your salespeople get the timing right, guiding them on when they should hold off while ensuring that they keep the momentum up and don't let a Prospect go too long without the next activity being carried out.

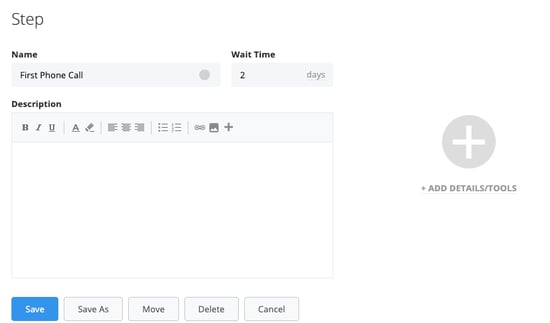
Milestone steps are a great way to add a natural flow to your Process. If you get to a specified milestone earlier than expected, you can skip through the Process and save yourself some time.
Learn more about Milestone Steps - how they can help you work smarter with your prospect lists, and how to set them up.
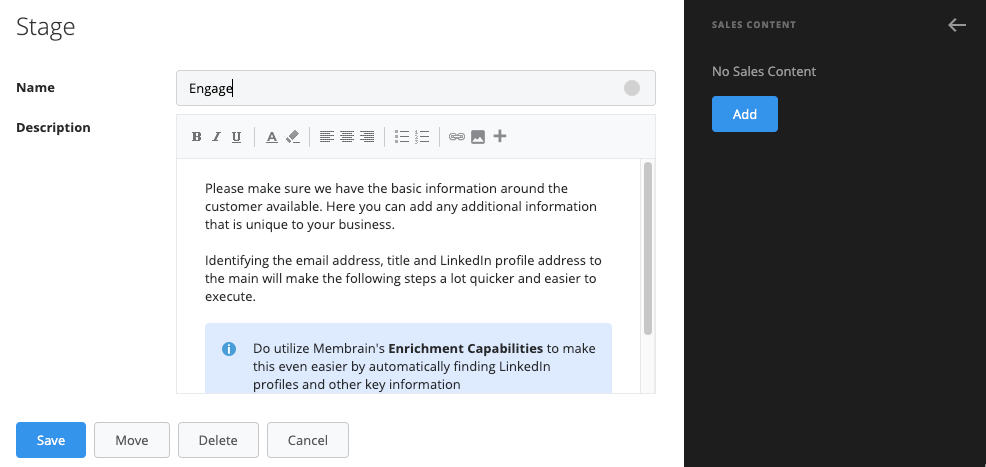
A Prospecting Process can work perfectly well with just one Stage, but if you want to break it up into 2 or more Stages, that works too. Stages can be used for lots of different scenarios, for example, to help identify when a Prospect has passed an important milestone and should perhaps be managed differently.
To add a Stage to your Process:
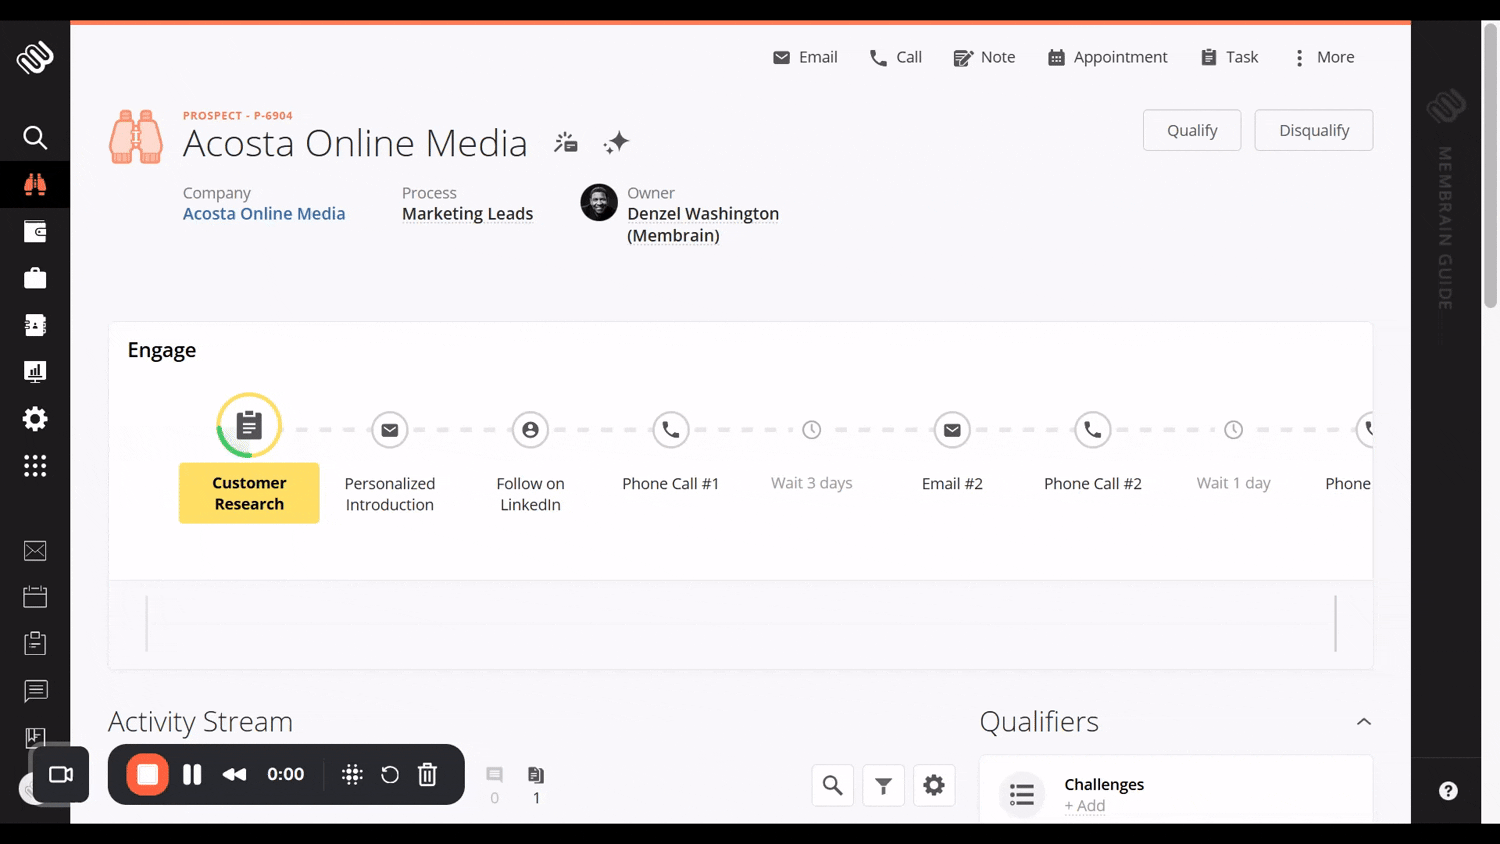
Once you're happy with the steps you've added to your Process, you can add lots of functionality to these steps, such as email templates, call steps, or even playbooks or scorecards. Learn how to do this in this separate article which covers how to Add tools and details to Steps.
Qualifiers are a great way to filter out the prospects that might not be worth pursuing and to pinpoint the ones that have potential, based on certain criteria (eg. industry type, budget, pain points, etc). Once you have determined what your ideal customer should look like, you can build your qualifying questions and add them to the Prospecting Process, to be answered during the course of the prospect life cycle. These Qualifiers then guide your team on whether to Qualify or Disqualify the prospect, based on the answers to those questions.
You can read lots about Qualifiers in Sales Projects and Account Growth here, but here's a quick step by step guide to get started with Qualifiers for Prospecting.


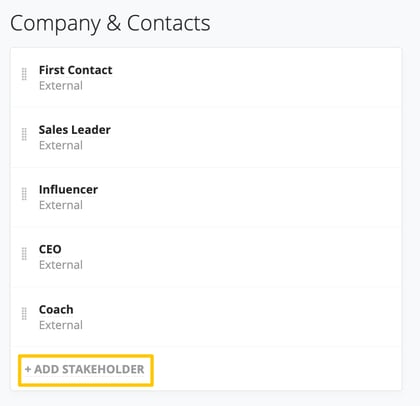
The Stakeholders in your Prospecting Process are the important Contacts you're working with, who have been assigned a Role like Decision Maker, Validator, etc. Adding Stakeholders and their Roles is done from the contacts area of the Prospecting Process, to the right.
By defining Stakeholders you want to be identified while working through the Prospecting Process, you can guide your salespeople to ensure they identify the important people for the Prospect you're working with, every time.

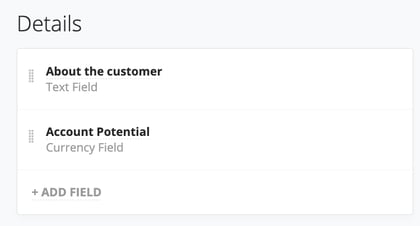
Using the Details section in the Prospecting Process is a great way to record important information about a prospect as you work. Information such as Urgency, Budget, Pain Points, etc can help you to get a full picture of where the potential customer is in terms of suitability or readiness to move forward.
Information captured here is not necessarily a show stopper in terms of if they will enter your pipeline as a sales project or not, that's what Qualifiers do. But this information is still very important and should be captured nonetheless.
Details are created as Custom Fields in the Prospecting Process and found on the right-hand side of the Process editor. Learn more about Custom Fields here.
Membrain has the capability to respond to events with automated actions and greatly simplify the workflow for both sales management and the sales team. These events can be used to notify somebody that they have been assigned a new lead through email or to create a task for somebody to follow up within a certain time frame or similar.
To learn more about events, read the article about Automated Events.
As with Sales Projects and Account Growth Projects, you can add rules to your Prospecting Process. These rules will help salespeople prioritize where they should spend their time, and which prospects to engage with.
Rules can be set on things such as Time to First Activity, useful for inbound or automatically generated leads, or Number of Days Since a Step was Last Completed. For more information, read the article about Rules in Membrain.
Disqualify reasons are a listing of all the reasons why you might disqualify a prospect and a great way to record and analyze this data in the future. As disqualify reasons can be used across multiple Processes, they are not set up in the individual setup for each Process, but rather added at the Admin level.
To learn more about how to create Disqualify Reasons, read this article here Disqualify Reasons
Once you're happy with your new Prospecting Process, click on the Publish button to the top-right of the page. You can update and improve your Process at any time by going back into the Process editor, making changes and publishing again.


