Popular Content
Membrain for:
The sales project view is where you find all the information about a particular sales project. It's where you bring the sales project through your unique sales process, step by step, stage by stage, right through to the end of its life cycle where it is finally won or archived.
Locate your Sales Projects from the Active Pipeline or Sales Project list from the wallet icon ![]() in the main menu, use the search icon
in the main menu, use the search icon ![]() to locate a specific project. Or just hit S (search) on your keyboard and start typing.
to locate a specific project. Or just hit S (search) on your keyboard and start typing.
In the upper part of this view, you find the fundamentals of the Sales Project.

The main part of the screen is where you see the details of the Sales Project itself, laid out in a visual format that corresponds to your unique Sales Process. The Sales Project is divided into stages that are specific to your methodology and terminology. And in each Stage are the Steps that help you follow your Sales Process thoroughly.
As these Steps are completed, Membrain automatically moves the Sales Project forward through the Process to the next uncompleted Step. To provide a clear overview of progress within each Step, a progression bar will appear next to a Step when it has been partially completed.

Always try to fully complete all Steps under each Stage of the Sales Process. But keep in mind you can manually move an opportunity from one Stage to another simply by clicking on the Stage header to which you want to move it.
You can also manually move to another Step within a process by clicking on the Step you wish to move to and choosing Set as Next Step.
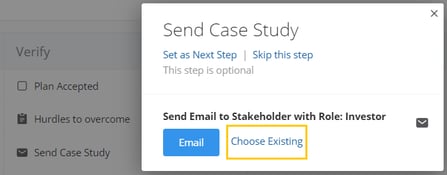
If Steps in your process require you to carry out an Activity, it’s of course, preferred that you create the Activity from the Step itself. For example, a Step in the process that requires you to send an email, create an Appointment with a Stakeholder in the project, etc.
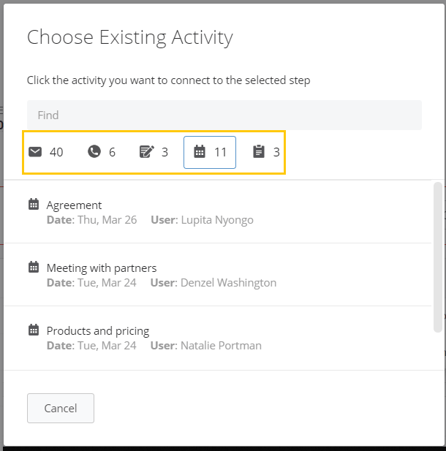
If you've already created the Activity outside of the process, you can still connect that Activity to the Step to complete it.
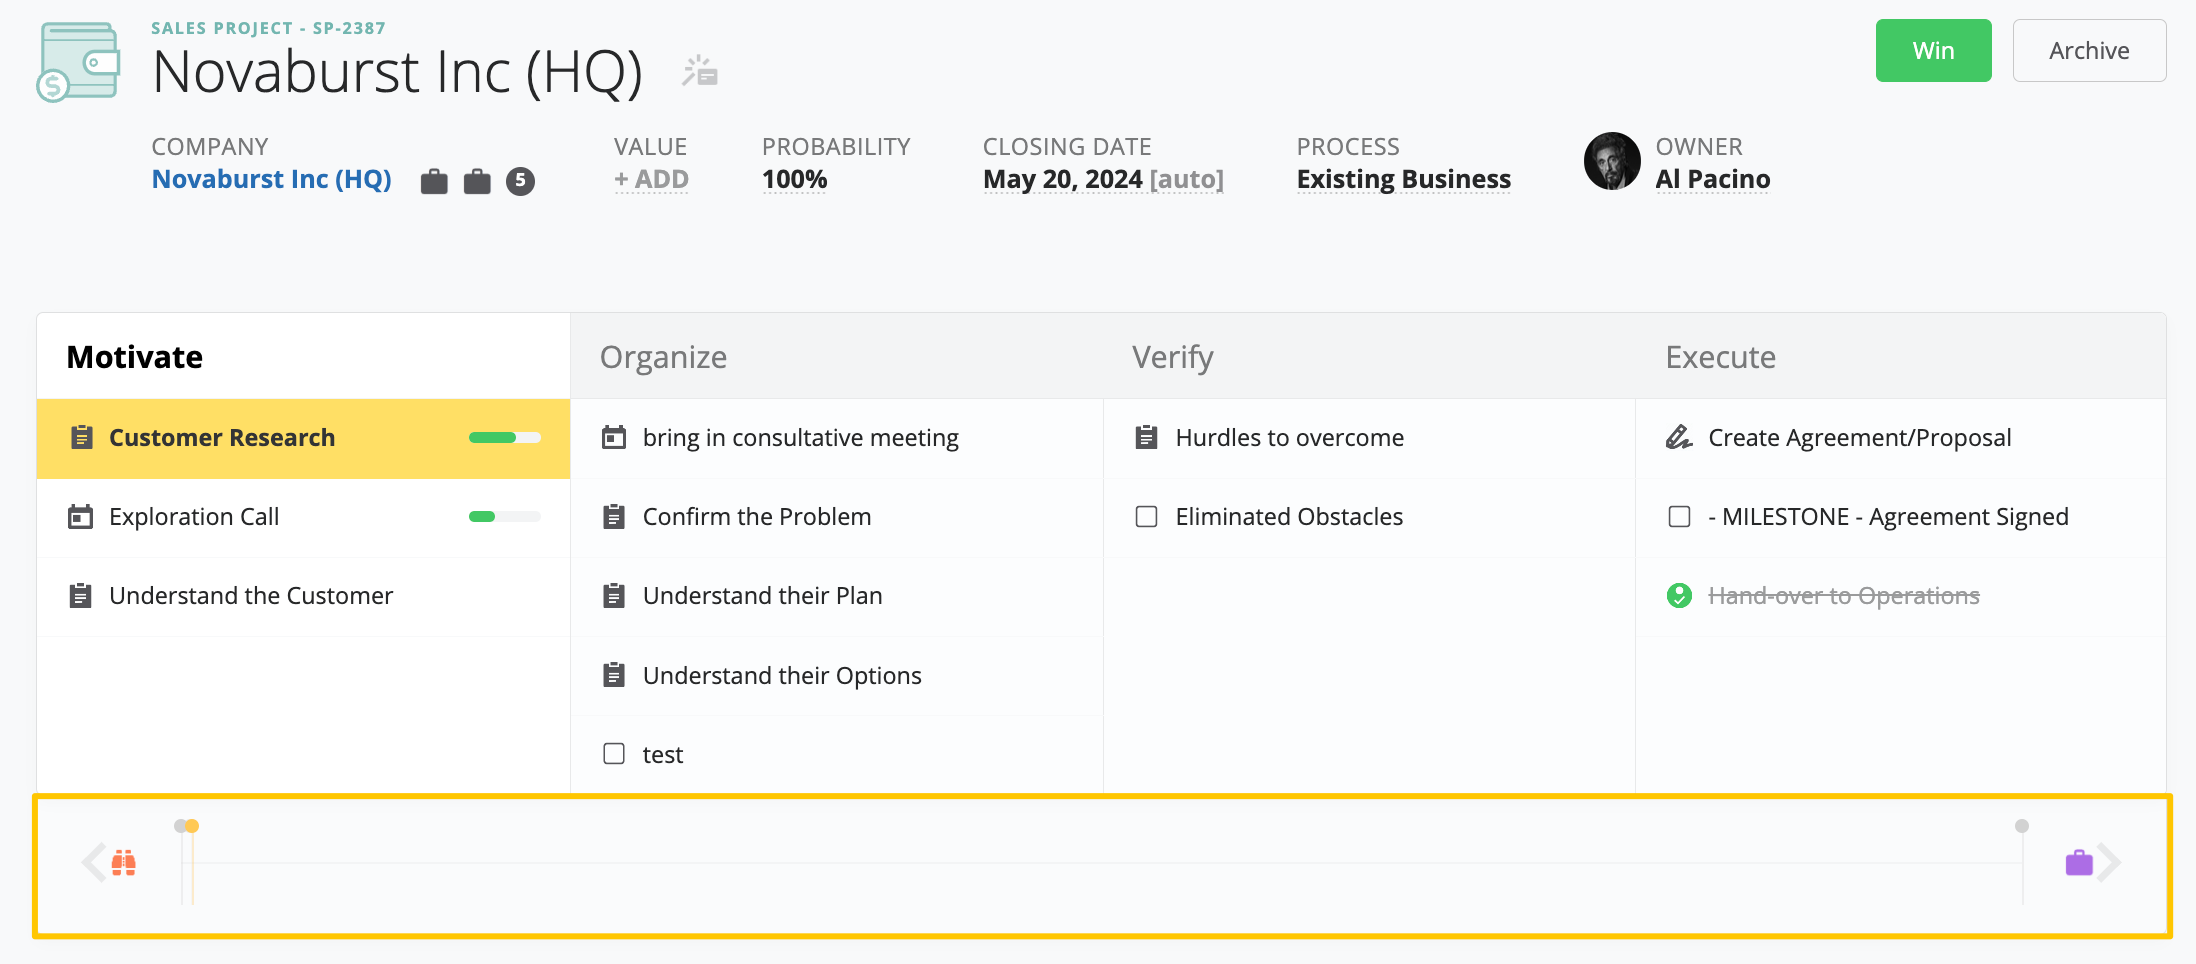
In the Sales Projects core product of Membrain, the timeline is an integral feature that offers a visual representation of each project's journey. It synchronizes with the activity stream, capturing key moments from logged activities to map the project's development chronologically. As you progress through various stages of a sales project, the timeline dynamically reflects this evolution, making it easy to track milestones and assess pacing. The 'Next' and 'Previous' navigation aids streamline movement between connected prospects and projects, enhancing project management efficiency. This feature is invaluable for accessing quick previews of project details, enabling a smooth transition across different sales projects while maintaining focus on current objectives.
Below the Steps and Stages of the process, you will find additional information about the project itself. This information gives you the extra background to the project and shows you the results of the data that you have entered in the Steps of the project.
It also allows you to gather further information outside of the Steps completed above. When editing information, you can look at historical information that applies to the field. Click here for more information.

This box can contain any type of information about the Sales Project that you can filter, measure or analyze. Numbers, lists, dates, etc, all have a home in this box.
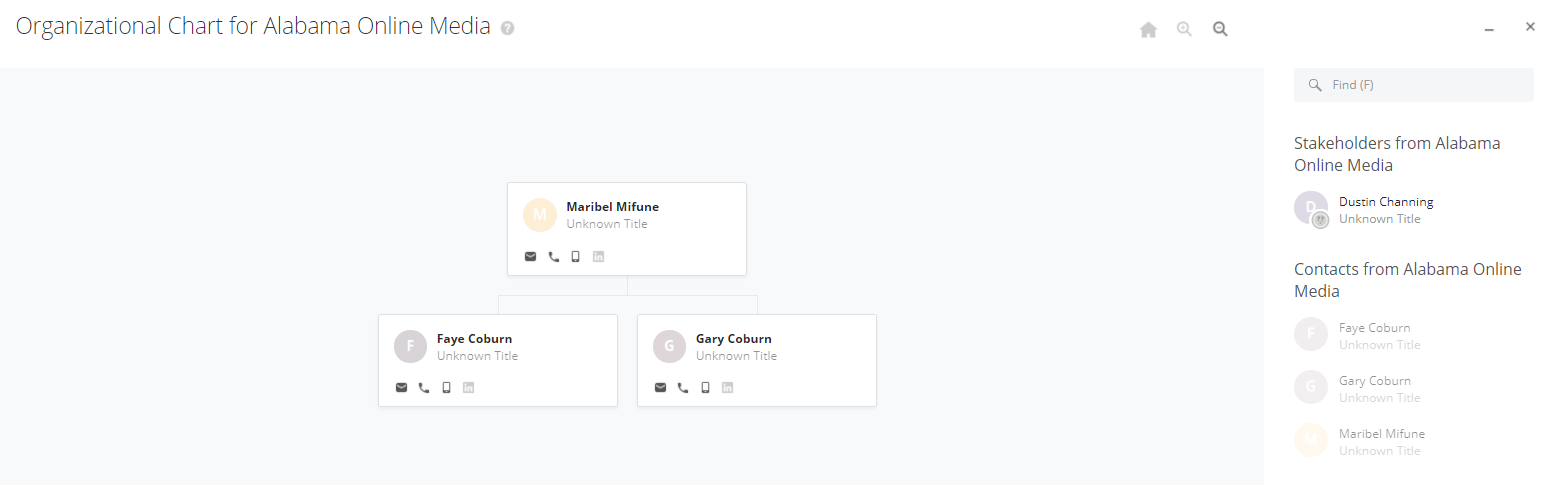
This is where you capture the people involved in the process and where you go beyond just their title. Is a CEO really the Decision Maker in this opportunity? Is a CTO an ambassador/sponsor/mobilizer or is that person a guard/talker/etc that is trying to thwart the project? Record this information here.
You can capture both external (people and resources from the perspective clients' company) and internal resources (such as pre-sales, technical sales resources, or sales assistants from your own company).
This is also where you can easily access the Contact details for any Stakeholder by just moving your mouse cursor above the name of a Sales Project participant. This brings up a dialogue box where you can not only access the information already identified for the Stakeholder but also edit and add new information.
This box is intended to capture the softer aspects of the Sales Project. Have we really gotten a good response to our most critical questions? Have we fully understood what this opportunity means for the client? Have we understood the client? There are many great sales questions and this is where they find a home in Membrain.
The names for these boxes (What, Who & Why) are defaults and have been chosen to help you understand what information should be captured in each. These can be changed by an administrator as part of the initial setup to reflect your process terminology.
Directly below these boxes, you find the Activity Stream. This is a great resource to see all the Activities, past and future in chronological order. Every Appointment, Email, Task, Note... pretty much anything that ever happens within this Sales Project is recorded here. And all filterable of course to help you easily find the information you need.

You can also comment on these Activities to keep all discussions right there in context, and even mention your colleagues to get their immediate attention on specific items. Learn more on how to work closely with your colleagues in this article Collaborate with Comments & Mentions
To the right of the Activity Stream is where you find the Participants list. This is a list of all the Contacts (including Stakeholders) who have an active role in this particular Sales Project.

You will see the contacts separated into those that are Stakeholders in the Sales Project vs. those that are company Contacts.
This area is where you view and upload Documents related to this project. This list includes documents that have been:
Click on the + to upload a document.
And hover over a document to manage it, eg. add a category, delete or replace it.

The "more" menu in the sales project core product provides several options to help you manage your sales projects effectively. Here's a list of the options included in the menu:


