For each Prospecting Process, you set up and configure, there are certain settings that are Process wide. These settings are managed by an administrator and are explained below.
Administrators can set Process settings from the process editor. To do this go to:
The General tab contains settings that control key prospecting process behaviors, such as dynamic process, stakeholder attitude & influence tracking as well as stakeholder role assignment.
Enabling this feature gives Salespeople the flexibility to add extra steps to a prospect whenever they feel the need as well as skip steps they deem not being necessary. This ensures they can tailor each individual prospect's journey according to the situation. Learn more about Dynamic Processes.
When this is turned on, it allows Salespeople to more deeply engage with Stakeholders during the Prospecting Process, offering a nuanced approach to relationship management. Learn more about Stakeholders' Influence and Attitude.
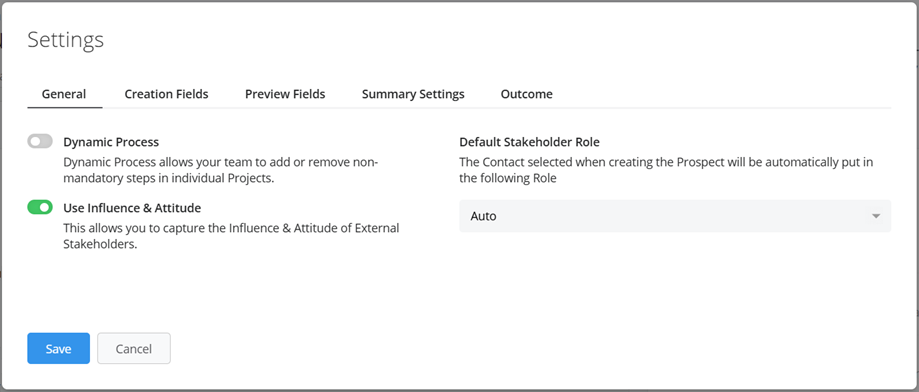
Administrators can also define a Default Stakeholder Role for new Prospects created within the Process. This setting determines which Stakeholder role the selected Contact is assigned to during Prospect creation.
By default, the setting is configured to Auto, which assigns the Contact by default to the first Stakeholder role used in the Process steps. However, administrators can instead choose a specific Stakeholder role from the list, or select None if Contacts should not automatically be assigned any Stakeholder role.
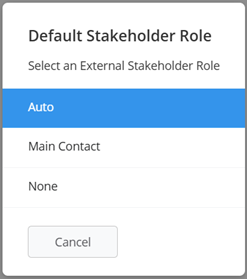
This gives teams greater control over how Stakeholders are structured from the very beginning of the Prospecting Process, helping improve consistency and reducing the need for manual adjustments later in the workflow.
You've now learned how to configure the General settings for your Prospecting Process. The next piece of the puzzle is to determine what happens when a Prospect is qualified. This is managed under a separate tab labeled "Outcome." To learn how to set this up and what options are available, refer to our dedicated article on Configuring Project Outcomes.


