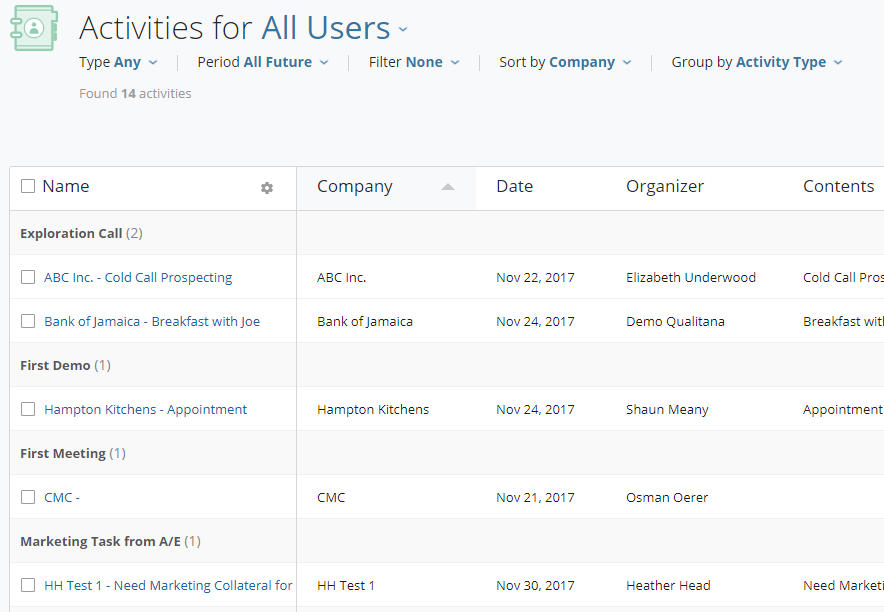
Activity Management is paramount in ensuring the required amount of work is being done to win a Sales Project or Qualify a Prospect. And keeping track of activities, both past and future, is made easy using Activity lists, found in the CRM area in the Membrain Menu.

Using this tool, you can view Activity information based on Membrain user and Activity Type, and configure the list to show you what you want to see, and how you want to see it.
Go a step further and use filters to see information for a specific company, process or campaign to get a solid understanding of what work has been carried out where, and what is planned for the future.

Some examples of usage:
There are lots of options available to configure your list exactly as you want it, with all the specific data you are looking for.
First, choose from the options at the top of the view to specify the overall information you are looking for.

Click on the blue text to select:
Then, use the ![]() configure icon in the Name Column to find even more options and choose which specific data you wish to see.
configure icon in the Name Column to find even more options and choose which specific data you wish to see.
From here you can select up to 20 different fields to show, and reorder them by dragging them up or down the list to the right hand side.

Once you're happy with your data, you can resize each column by hovering between each column header until a line with arrows appears, and drag left or right.
Or rearrange the columns by hovering on a column header until you see the ![]() handle icon appear beside it and drag/drop it left or right to where you want it.
handle icon appear beside it and drag/drop it left or right to where you want it.
If you spot some data that is incorrect or incomplete in the list, no problem! Click into the activity to make the changes required.
Note: Activity custom fields can be edited directly from the activity preview dialog. From the activities list, you may also edit activity information in bulk, by ticking all the relevant activities, then pressing the "Change" button at the bottom of the page and selecting the relevant fields.


Once you have created the list of activities you wish to see, you may want to export it to use in Excel:
You can even make this export configuration available to your team or everyone in the organization to help streamline reports and save time across the board.
Likewise, you can upload a pre-saved configuration from this view also.
From this view, you can also import activities that may have historically been recorded in another system.
To learn more about Importing Activities, read this article here.
From north to south, east to west, Membrain has thousands of happy clients all over the world.


