Popular Content
Membrain for:
Setting up your account to use Membrain's email composer is a great way to benefit from all the additional email features Membrain has to offer. Such as automatic saving of emails to the correct place in Membrain, using templates in your Sales Process and even email tracking.
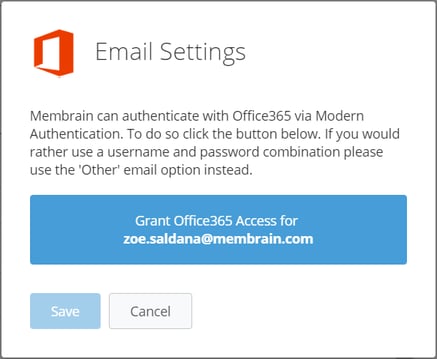
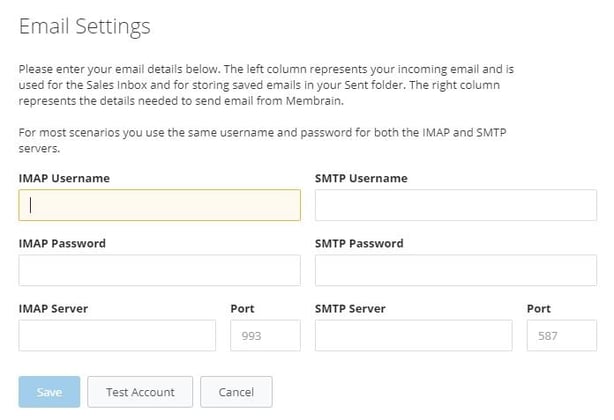
In order for Membrain to send email on your behalf, and to automatically save your inbound and outbound emails from another email client (see below) some configuration is required.
Not working for you?
Please see the following article that will help you troubleshoot what could be causing those issues for you. Email - Troubleshooting and Technical Details
Add a signature here, either by using our signature editor to create one from scratch, or upload one you already have. To learn more about signatures, take a look at this article Create an email signature with a useful step-by-step guide and video instructions.
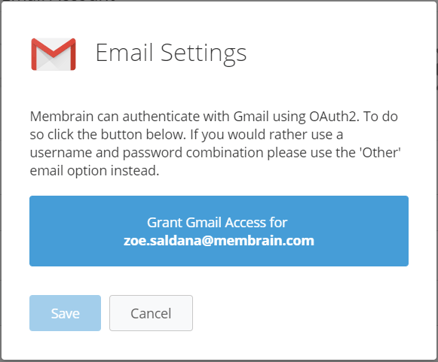
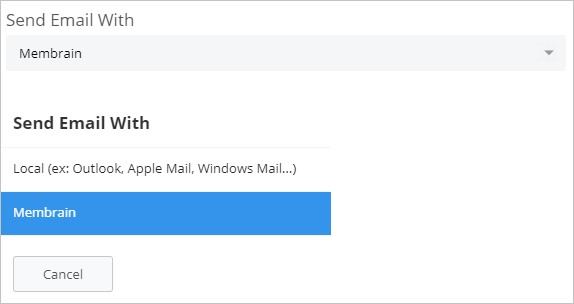
Choose how you would like to send your email - either by using your own email client (eg. outlook or Gmail etc.) or by using Membrain's own built-in email client. We recommend choosing Membrain's client for additional functionality.
Here you can choose where you would like the emails you send via Membrain to appear in your own email client. Leaving this set to Default will automatically use the standard sent folder. However, if you are using a localized version of an email client, your sent folder may be called something else. Or if you would like to simply have them stored somewhere else.

The Archive button moves an email message to a folder named “Archive.” It's a one-click option to clear mail from the Inbox without deleting it.
When an email is opened, there are the following options in the toolbar:
The default option is the “Archive” folder. If you don't have a folder already created in your email client, you should create a folder named “Archive”. 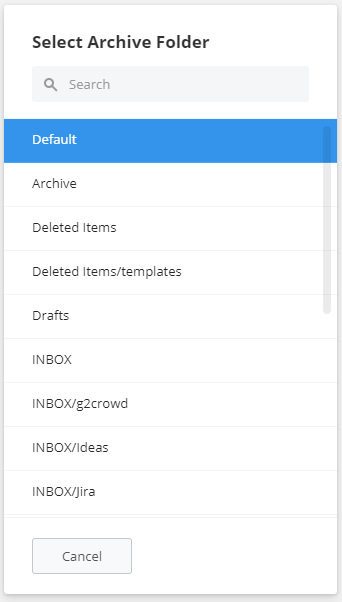
Tracking emails can be turned on or off here. Check this box if you would like to track emails by default and receive Read and Click notifications for the emails you send via Membrain.
Regardless of whether this is turned on or off by default here, you can choose to override this setting for each individual email you send from the email composer itself before sending.
![]()
Learn more on how Email Tracking works in this article Email Tracking
Enabling automatic archiving of your email to Membrain is a great way to ensure all email communication between you and your contacts is saved to the relevant Sales Project or Prospect in Membrain, even if you send emails from your 3rd party email client. The benefits here are that all communication with contacts in sales projects and prospects is visible to anyone in your organization that needs to see it.

When you enable this feature, Membrain looks at the sender or recipient of the email, and checks it against the open Sales Projects or Prospects you have in Membrain. And if the sender or recipient matches a Stakeholder in a Sales Project or Prospect, it saves it to the activity stream.
IMPORTANT: If you do not have the sender or recipient saved as a Stakeholder in a Sales Project or Prospect, then Membrain can not automatically relate it as it does not know which Sales Project or Prospect the email is related to.
Before you turn this feature on, we recommend that you speak to your Membrain Administrator about how this feature works in your organization. Your Membrain Admin has a set of options available that determine when sales-related emails will be saved, and to how many of the sales projects or prospects within your Membrain account they will be related to.
These options are configured in the System Setup, and a brief explanation is outlined in Grey, just under the enable buttons. More details about these options can be found in this article Autosaving activities.
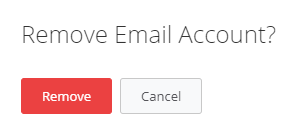
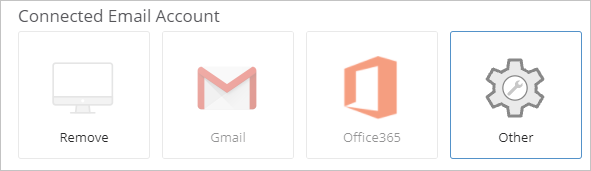
Once an email has been set up, if the email address you used in the original setup has changed, or your email client has been updated or changed, you can simply remove the connect email account and redo the email set up with the new information.