Membrain Meet is a powerful meeting scheduling tool that can be configured in lots of different ways to offer your contacts a smooth and intuitive service.
It's easy to configure, and is customizable for each Membrain user, allowing a personalized service to the whole team.
Step-by-step guide
- Click on your profile picture (bottom left) and go to My Settings.
- Click on Membrain Meet and turn on the "Enable Membrain Meet" toggle.
- Apply the settings that suit you best. You can set available durations, how many slots to make available for each day, choose to automatically accept a meeting, block holidays, as well other options.
- Add Ways to Meet, and include your own Zoom or Teams account, so your contacts can book directly with your choice of online meeting.
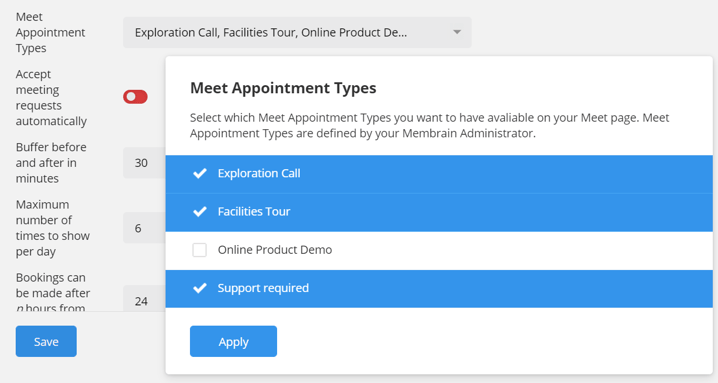
- You can also create preset Appointment Types for selection by your contacts
- Once you're happy with your settings, click Save.

Additional settings - times available
There are also additional settings you can add which will block out days or times which you do not want to ever offer as available time slots, even if you have space in your calendar. The green blocks indicate times that will be made available to your contact IF it is not already booked by another meeting in your calendar.
Simply click on a square to make it available or not.

Integrate to Zoom or Teams
You can also offer options for how you would like this meeting to take place, e.g. by phone, Zoom online meetings, or Teams online meetings. These are called "Ways to meet" and other options can be added to here like physical meetings, phone calls, etc. Your selections are then visible to your contact in a drop-down list when they're booking the meeting with you.
When your contact selects Zoom or Teams online meeting, Membrain uses your Zoom or Teams account to create the meeting.
Using Meet Appointment Types
If you wish to offer tailor-made appointment types to your contacts, you may as a Membrain administrator do so through the following steps.
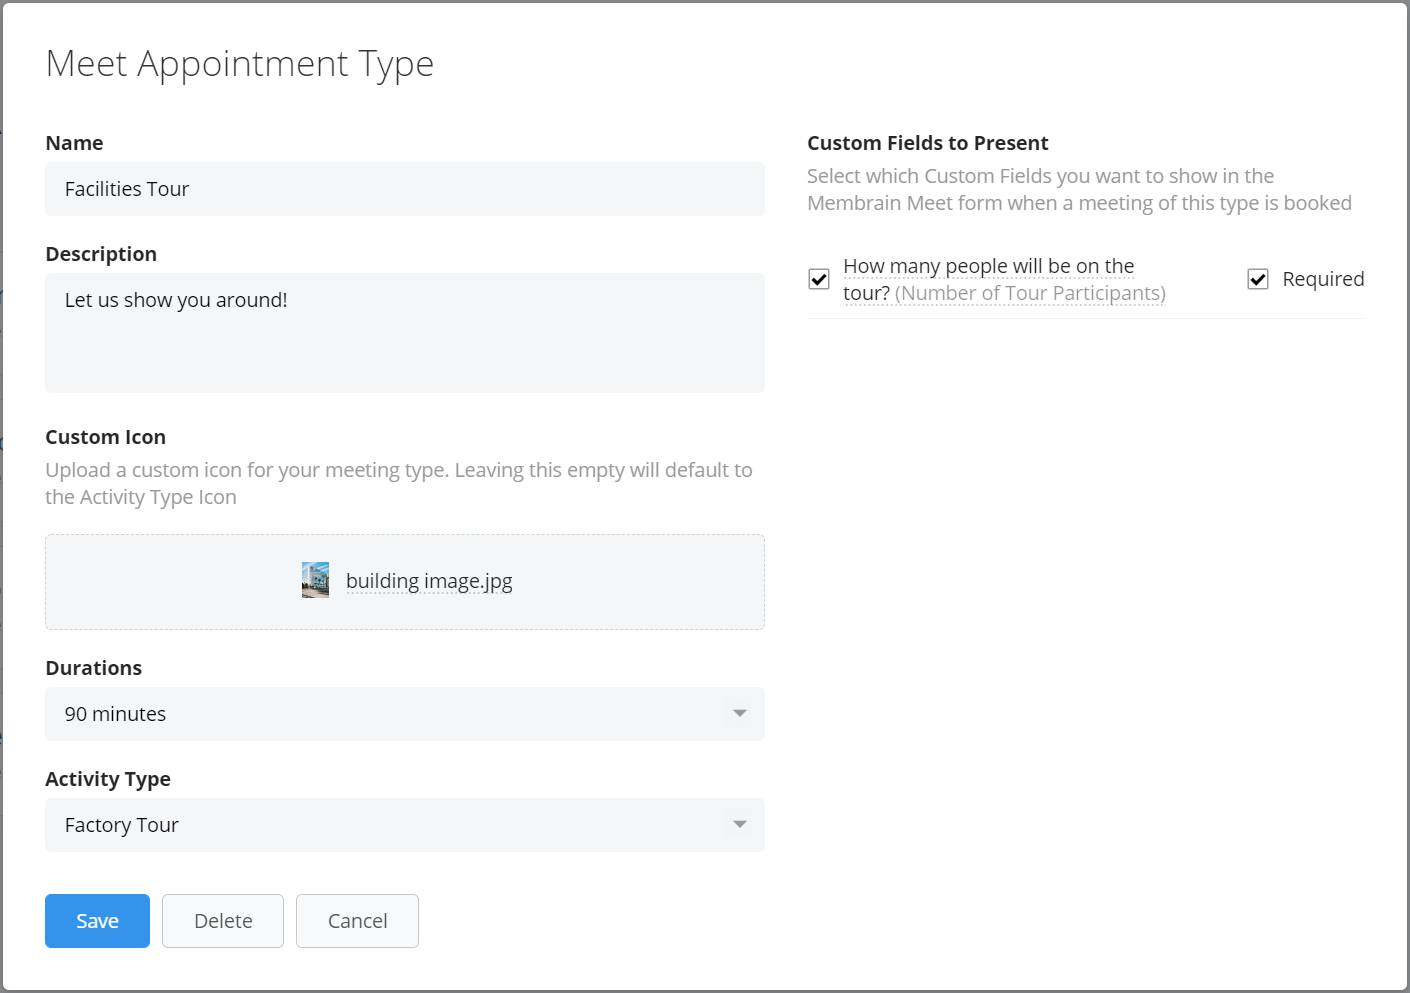
Step 1. Create the Meet Appointment Type
- Go to System Setup.
- Scroll down to Productivity and Collaboration and click on Meet Appointment Types.
- Click on the blue New Meet Appointment Type button to get started.
- Add the details that will be shown to your contact as they book their meeting, including:
- Appointment Type Name
- A description of what the meeting you are offering will entail
- An icon or image that represents the appointment type. This is helpful if you plan to have more than one appointment type
- The preset duration of the appointment
- The Activity Type of the appointment. This ties back to Membrain's Activity Types, and allows you to include Preset Agendas in your appointment
- Custom Fields you would like to have prefilled out ahead of the appointment. These can either be a required field or optional. If you would like to personalize how this question is asked to your contact, you can simply click on the custom field and rename it to a more human question.
- Press Save, and you're done.

Step 2. Add the Meet Appointment Type to your Membrain Meet page
Once your Meet Appointment Type(s) is/are created, don't forget to go back to your personal Membrain Meet Settings and add the ones you want to offer to your contacts.


