Popular Content
Membrain for:
You can get to the Sales Calendar in 2 ways:
Choose between daily, weekly, or monthly views to get a clear view of how your schedule looks from the outset.

When you are viewing your calendar exclusively you will notice a color coding on the left-hand side that shows the activities that are in your calendar for the week or day (depending on what you have selected). Each activity can be assigned a different color to ensure your calendar is clear and organized.

You'll find more information on how to assign colors to activities in this article about Managing Activity Types.
You can also view another colleague's or a group of your colleagues' calendars in the same view as your own too, by simply selecting their names from the drop-down list in the top left corner.![]()

Keep in mind that when looking at two calendars, if you share an appointment, Membrain will only display one color. This color will either be the host of the meeting or, if neither party is the host, the color will be determined alphabetically.

When viewing others' calendars, you also have the ability to view their holidays. The day and date for everyone’s holidays will appear in red text; however, your holidays will show the entire day highlighted in red, while others’ holidays will not.

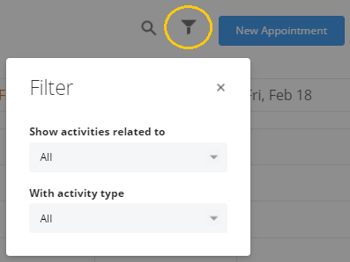
You can filter your views by relation to a project type, Tickets, or any of your Activity Types with just a few clicks. Just click on the filter icon and choose what you need to see.
If your team is international and working from different time zones you can see the different local times in the calendar for two people at a time (yours and a colleague's), which is handy when trying to find an appropriate time for joint appointments.

If you hover your curser over the times you will see that the first row of times is your local time and the other is the person whos Calendar you are currently viewing.

If more than two users are selected the system shows local time for the most occurring time zone amongst the users you have selected, as the second option.

An additional feature in the Sales Calendar is the very useful list of activities you will see above your daily or weekly view.
This list shows you every activity you have carried out so far in your day or week, including emails, phone calls, tasks completed, etc. It will also show you upcoming reminders you have set which you can simply hover over to see further details. If you have a lot of activities you can click on Expand to see them all. Learn more about managing activities here.

To create an appointment in your calendar, follow these steps:
Learn more about creating appointments in this article.
Do you have appointments that occur at regular intervals like for instance monthly meetings, quarterly customer account reviews, birthdays, etc? An easy and effective way to book these without needing to create all of them manually is to set them up as recurring appointments. This will ensure that no important meeting falls through the cracks and that all of its participants are aware of this in advance when looking in their calendar.


Membrain can be set to send you reminders about your upcoming appointments, in the form of alerts in Membrain Guide, or as an email, with lots of options for when you would like to receive them.
There are two ways to set up reminders:


You can choose to set your appointments as either Free or Busy, allowing you to manage your day the way you want to while ensuring your free/busy time is up to date. This is very handy when used along with Membrain Meet, allowing others to find available (and free) times in your calendar and book a meeting with you.
Set Free/Busy time by right-clicking on an appointment and choosing Mark as Busy or Mark as Free. Or, in the appointment itself click on the More menu to see these options.

Don't want your colleagues to see the details of all your appointments that sync from your private calendar? We've got that covered too. You can click right-click on an appointment in your calendar and select mark as private. Or, in the appointment itself click on the eye icon to change an appointments' visibility.

![]()
When setting up your calendar sync, you can choose to have all appointments sync as private. They will still show in your Membrain Sales Calendar, but the contents will not be visible to anyone. These will also have an eye icon beside them to show that they are private.
Access the Properties of an appointment by selecting the "Properties" option, available from the More menu ("...") or the context menu (right-click on an activity in the Activities list view or inside the calendar). This action opens a dialog displaying essential details such as who created and last changed the activity, along with their respective dates. Additionally, you can view or add an External Identifier for the activity. To edit the External Identifier, simply click on it or the "+ ADD" text if none is currently assigned.


Currently using another calendar? No problem! It's easy to sync your Google, Office365, or Outlook calendar with Membrain's Sales Calendar.
If you are using a Gmail account, we strongly recommend that you upgrade to a Google Workspace Enterprise account when syncing Membrain to your Google Calendar. If you sync to a free end-user Gmail account, not all functionality is guaranteed - specifically Participant Invite Statuses.
This two-way sync ensures that all the appointments created in Membrain's Sales Calendar will appear in your other calendar. And of course, any appointments that have been made in your other calendar will also appear in your Membrain Sales Calendar so you can see what's on the agenda, regardless of where it came from.
This is true even for recurring events and full-day events that have been created in Google and Office365 calendars.
Synced appointments are shown in your calendar with a dark gray background, so they're easy to spot.
Keep in mind that synced appointments cannot be modified in Membrain. Edits or changes can be completed in the calendar where the event was created, and will then be synced automatically and reflected in Membrain.

Go to Calendar Sync in My Settings and choose which calendar you would like to sync with. Read this article Calendar Sync setup for a step-by-step guide.
When syncing appointments from a remote calendar to Membrain, it's important to note that not all appointments may be fully synced. If you hover over an appointment, it will provide the reason why it couldn't be fully synced. For example, a recurring appointment that wasn't originally created in Membrain may appear in a gray color.
In addition, for an appointment to appear in your calendar, you must be added as a participant directly. Even if the appointment is synced successfully, it will not be visible in your calendar unless the email that is connected to your Membrain account is listed as a participant.
Our best practice to get historical appointments into Membrain is to do a mass export of these from your remote calendar and then perform a mass import of these into Membrain. Here you can read more on how to import activities. If you need guidance, please do not hesitate to contact us at support@membrain.com
There's lots of clever functionality in Membrain's calendar, including:


