Membrain has the capability to store your most important documents relating to your Companies, Prospects, Sales Projects or Account Growth projects. With Membrain, you can easily upload and store a wide range of document types, including invoices, sales contracts, and marketing materials, making it easy for your salespeople to access the information they need and efficiently organize and manage all of their important documents in one central location. Additionally, Membrain's document management features includes search and filtering options, ensuring that your sales team can quickly find the documents they need, when they need them.
Membrain supports all types of Document files, such as PDFs, Word documents, spreadsheets, presentations, and images. The Document size limit is 100 MB size, and very large files such as videos may need to be compressed or uploaded elsewhere.
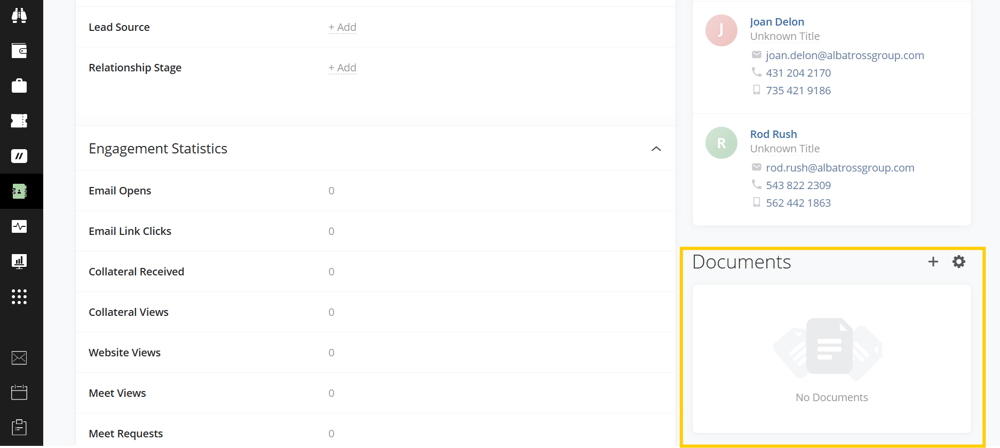
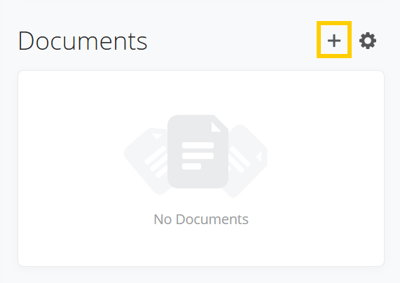
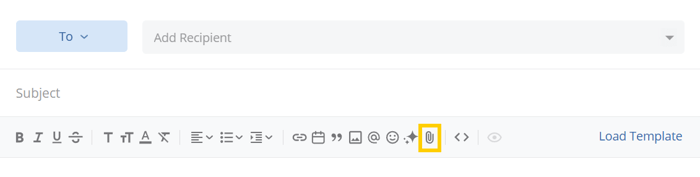
You can upload Documents in a number of different ways. Through manual uploads at a specific location (Companies, Prospects, Sales Projects or Account Growth Projects), through Emails connected to one of their items or in Steps in a Process.


In Membrain, documents are classified using document types and document categories, which serve different purposes.
A Document Type defines what kind of business document it is, such as a Quote or an Order. Document types determine how a document behaves in the system, including how it is numbered, filtered, and reported on.
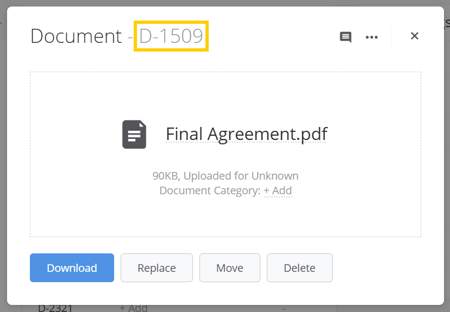
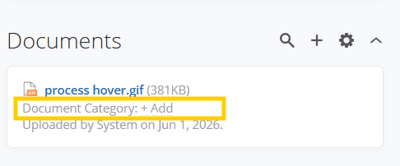
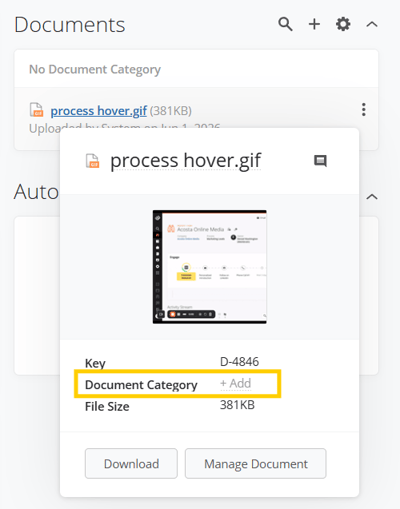
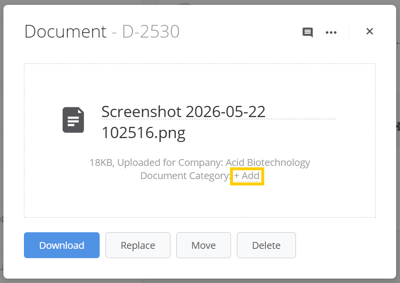
A Document Category is an optional way to further organize documents within a document type based on your own needs. Categories do not change how a document behaves in the system; they are used to support organization, filtering, and reporting.
For more details on how to create and manage document categories, see the Document Categories section below.
Each document uploaded to Membrain is assigned a unique Document Key. This key is automatically generated when the document is created and follows a sequential numbering system, starting at 1 for each document type and increasing by one with every new document of that type.
If desired, you can define a custom starting point for a document type by setting a new Base Key. This can be useful for aligning document numbering with internal systems or conventions. The new Base Key must be higher than the current highest key value for that document type.
To update the Base Key for a document type:
Go to System Setup
Scroll down to Settings > CRM > Document Keys.
Select the relevant document type and enter the new Base Key value.
Press Save to apply the change.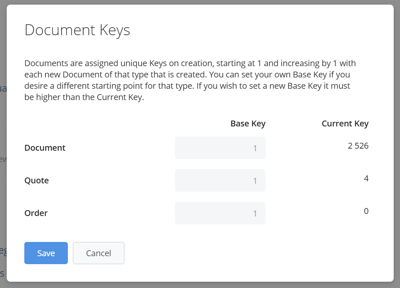
Once set, all newly created documents of that type will follow the updated numbering sequence.
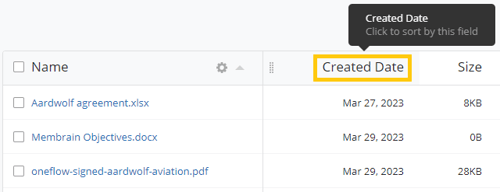
Document Keys can be used in the Documents List to quickly locate specific files using the search bar or the Global Search feature.
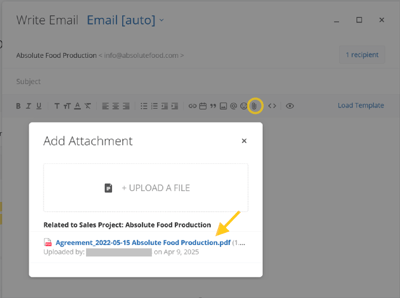
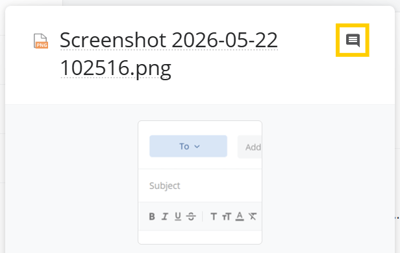
In addition to uploading Documents through Emails and Process Steps, as outlined above, you can also attach these to new Emails that you compose and/or connect them to a Process Step where you're supposed to upload a document.


Document categories allow you to further organize documents within a document type without changing how the document behaves in the system. By organizing your documents in categories, you can improve efficiency, increase productivity, and enhance collaboration. For example, you may want to categorize Documents based on their content or purpose.
For example, if you want to categorize documents based on their content, you can create categories such as: Sales materials, Product manuals, Legal documents, Marketing collateral, or HR forms.
Or you could even categorize documents based on their purpose, such as: Contracts, Proposals, Invoices, Reports, or Presentations.
To create document categories, follow these steps:
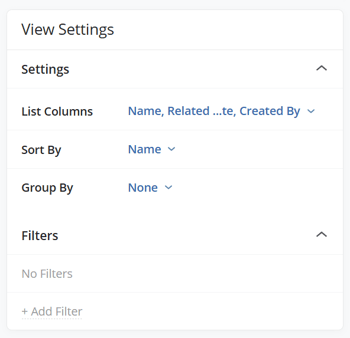
If you want to restructure the way Documents are shown (in a specific Company, Prospect, Sales Project, Account Growth Project, Ticket or Flow project page) you can edit the Document Settings.
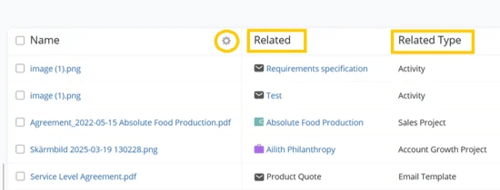
Click on the cog wheel in the upper right corner of the Document section of the page.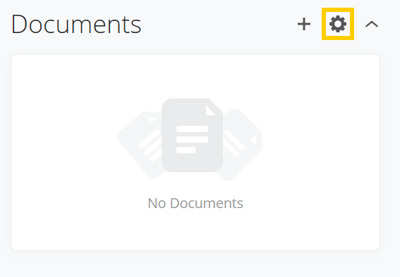
Select the Sort By, Direction, and Group By settings you prefer then click Save. 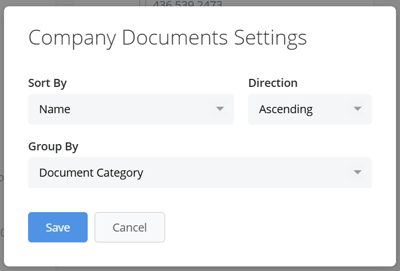
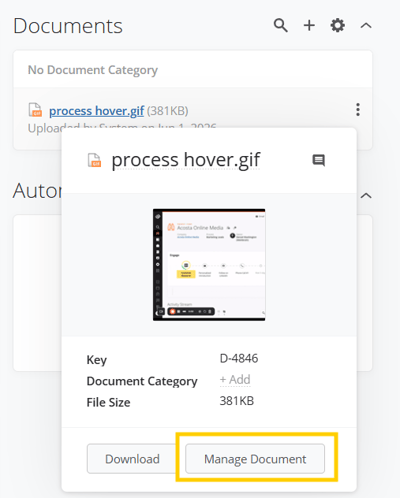
There are a lot of different ways to manage your uploaded documents inside Membrain, from replacing, renaming, downloading, commenting etc.
Option 1
Option 2
Option 3
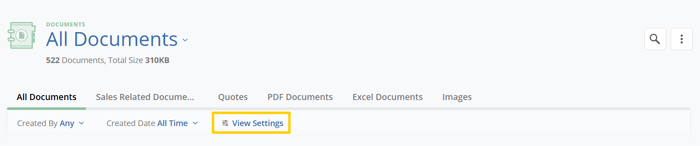
You can find your Documents throughout Membrain, directly on the different pages where you have uploaded them, but you can also see a complete list of all your Documents uploaded to Membrain.
This list gives you a full picture of all the documents uploaded in your Membrain instance and allows you to manage them from one single location.
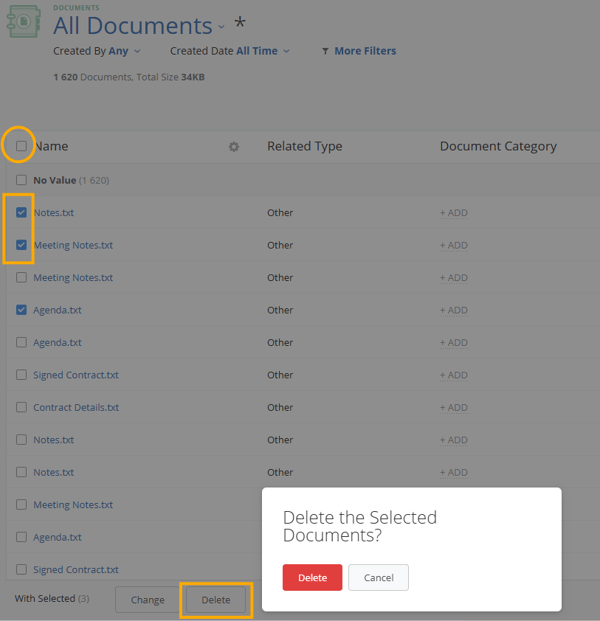
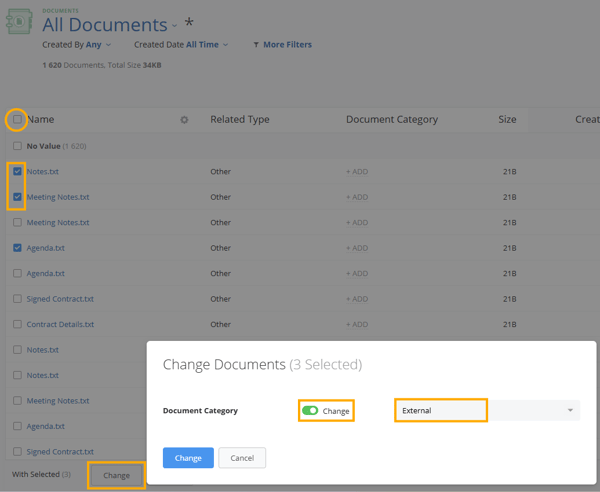
Some of the actions you can do from there are, search, sort by, group by and filter by as well as the source of the document, i.e. what place in Membrain it is saved in and related to. Additionally, you may manage your documents in bulk, e.g. mass delete them or mass assign a category to them.
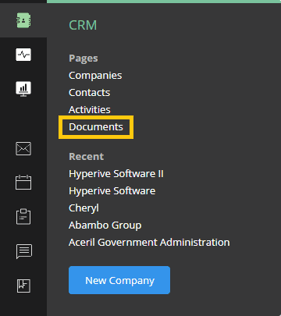
The Documents List can be found by clicking on the CRM icon from the vertical menu bar to the left.

You can build graphs for all your Documents uploaded to Membrain. These graphs can measure Count or Size and be used in both Dashboards and in Account Growth.
Documents are connected to one location at a time. If you upload a document to a Company page in Membrain, that's where it stays. The same goes for Documents uploaded to specific projects. Even though the project itself is connected to a Company, you cannot access Documents uploaded to a project through the Company page.
It is important to note that Membrain does not support bulk downloads or manual exports of documents. Users can only download documents one at a time. This limitation extends to API functionalities, where the GET/documents/id endpoint is available for exporting documents individually. Consequently, it is crucial to maintain local copies of important documents as Membrain should not be relied upon as the sole storage solution for critical files. Ensuring that original copies are stored securely on local or external storage systems will safeguard against potential data loss and provide a backup in situations where bulk access to documents is needed.
Given Membrain's focus on efficient document management rather than bulk storage, users should adopt best practices for document storage and retrieval. This involves categorizing documents appropriately within Membrain to facilitate easy access and organization. Additionally, maintaining an external backup of all significant documents is advisable to ensure data redundancy and availability outside the Membrain ecosystem. By doing so, users can leverage Membrain's capabilities for managing and accessing documents while ensuring that comprehensive storage and backup requirements are met externally.


