Popular Content
Membrain for:
Filters are an integral part of Membrain as they allow you to zoom in on a specific subset of data, helping you to focus on just the information you need.
And what's nice about filtering your data is, once you've created a view that you like, with just the information you want to see, you can save it as a View, to come back to it when you're ready. Learn more about Views in Membrain.
There are a number of ways you can filter your data. making working with the information stored in Membrain a breeze.
Using Quick Filters is a great way to quickly switch up the information you see. These Quick Filters are always visible and easily accessible from the top section of all areas in Membrain.
You can easily spot them as they are highlighted in Blue Text with a small arrow  icon to the right, indicating there is a selector available for use.

Here's how Quick Filters work in the Sales Project List view, but this concept flows throughout most views in Membrain.
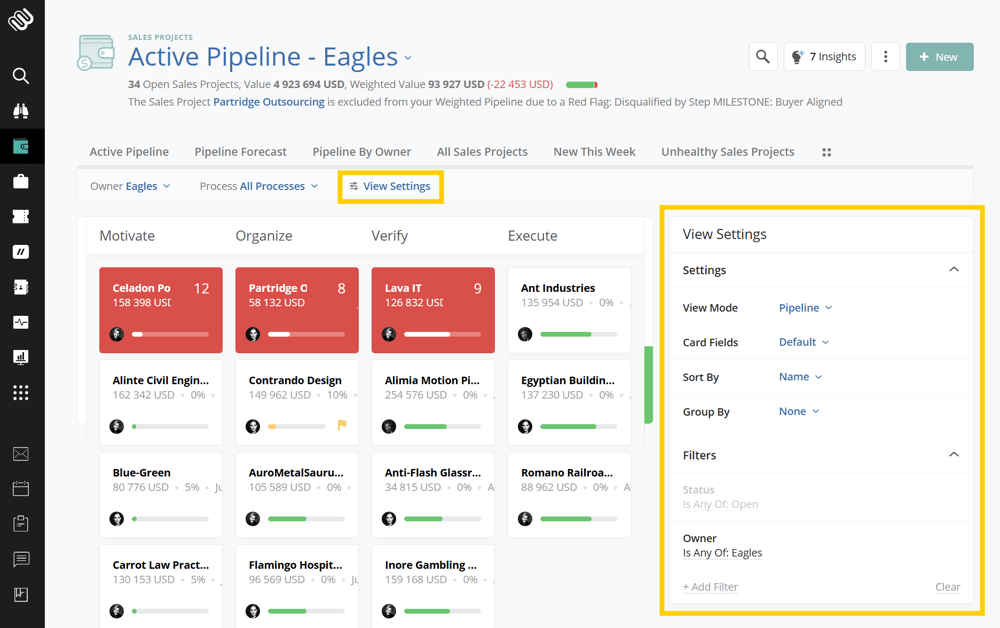
To really dig down further into your data and filter on specific data points, click on the ![]() button. When clicked, a Filter section box will appear to the right on your screen.
button. When clicked, a Filter section box will appear to the right on your screen.
Just like you expand/open the Filter Section box, you can also collapse it when you're done. This means you can collapse it by clicking on the ![]() button or by hovering over it and clicking on the x-button in the top right corner.
button or by hovering over it and clicking on the x-button in the top right corner.
You can use inline filters to narrow down projects based on the documents connected to them. This makes it easier to find projects that include specific files, such as quotes, contracts, or other key documents.
When filtering projects using documents, you can filter by:
Whether a project has documents or does not have documents
The document type, such as Quotes or Orders
The document category
A time period, such as Today, This Week, or This Fiscal Year
When applying time-based document filters, it’s important to understand how document dates are evaluated. For Quotes and Orders, time-based filters use the Quote or Order Date. For all other document types, time-based filters use the document’s Created Date.
As a result, the same time period filter may return different results depending on the document type selected. This behavior applies anywhere document-based filters are used, including project lists and dashboards.
For more information about document types, categories, and how documents behave across Membrain, see Managing Documents.
This tool shows the overall health of the Prospects, Sales Projects, or Account Growth Projects in your View. Hovering on the Health Bar gives you a preview of the health conditions.
The Example below are from a view of a Sales Project.

Clicking on one of the health conditions applies it as a filter. For instance, if you select "Yellow Flag" from this preview dialog, you will only see the Accounts that have a Yellow flag as the health condition.
To reset the filter and switch back to see all your accounts, you simply hover on the Health Bar again and click Clear Health Filter.
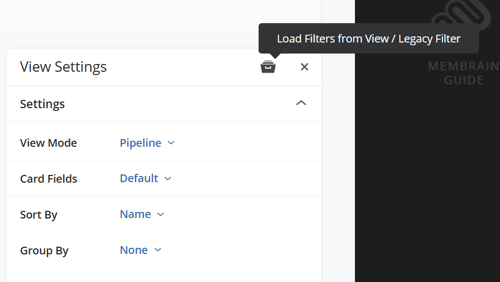
Saved filters can be used in many ways throughout Membrain.
To access saved filters, click the file icon to load a list of available views.

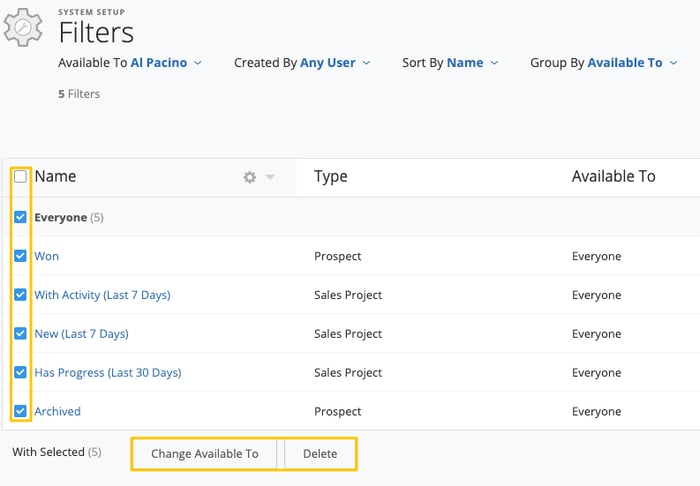
Administrators of Membrain can view all the Filters the whole team has created, and easily manage them or create and save new ones from a central location - The Filter Admin page. This centrally managed area, found under System Setup, also gives you additional control over how Filters are used, with the following functionality: