Pre-setup Prep
Before you get started with setting up the integration, there are a couple of things you need to do to prepare:
- Create the first version of a sales process in Membrain that matches the Salesforce Record Type Open stages that are used in Salesforce. The names of the stages do not need to match exactly, as they can be mapped to the corresponding stages during the setup.
- Create Win/Loss reasons in Membrain to match the Closed Won and Closed Lost stages in Salesforce. Learn how to add/edit Win/Loss reasons.
- Ensure you have the login credentials (username, password, and security token) of a Salesforce account that you plan to use for the integration.
This is often a system Admin account that is already used for other integrations.
- Review password policies for Salesforce integration user - password resets will stop the integration
Integration Setup
The next set of instructions should be carried out by a Membrain Customer Success Manager and a Salesforce administrator.
To start, go to System Setup and scroll down to Integrations and select Salesforce
Authentication
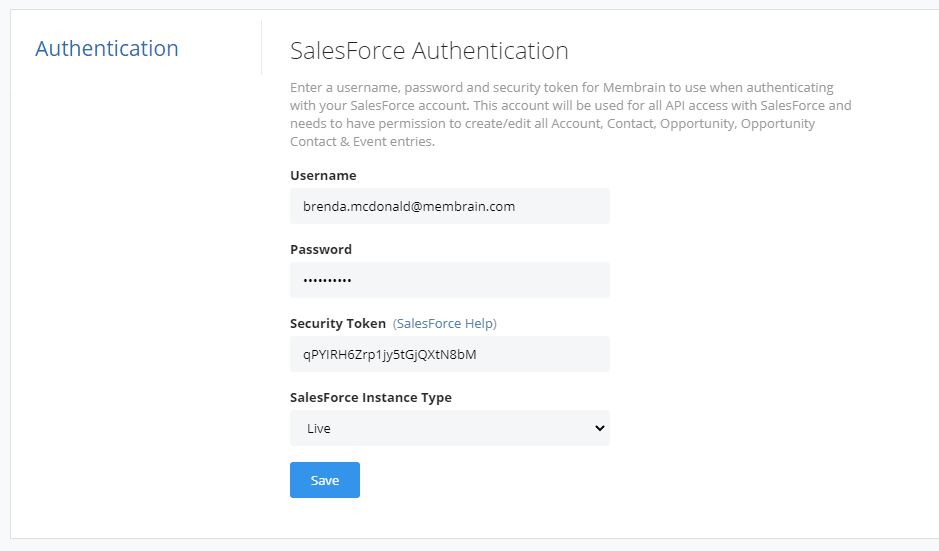
This first section allows Membrain to authenticate to Salesforce using a Salesforce user account.
- Add the Username, Password, and Security Token.
You can find information on how to see or reset your Salesforce security token here.
- Select if you want to use a Live or Sandbox environment. It is recommended to start with a sandbox environment if you are confident that it reflects your true Live environment.
- Click Save
Users
This section allows you to see the users in both Membrain and Salesforce, and where some of these users are in both systems.
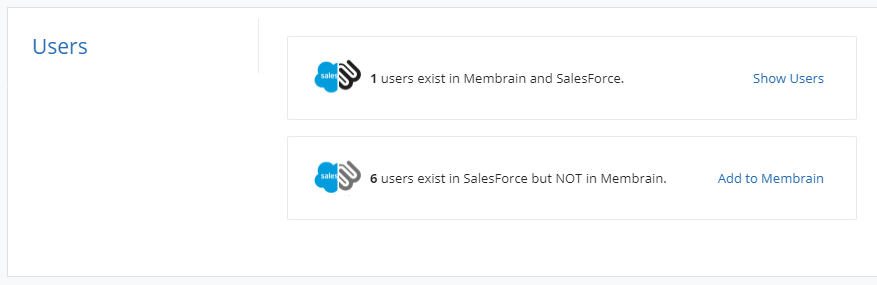
NOTE: The integration syncs ONLY opportunities where the owner of the opportunity is an ACTIVE USER in both Membrain and Salesforce
Adding Salesforce users to Membrain
It is possible to add Salesforce users to Membrain in bulk from this view.
Click on Add to Membrain to see a list of Salesforce users to add. Salesforce users are divided between Active and Retired users for convenience. You can read more about this in the article Adding Salesforce Users to Membrain
NOTE: It is not recommended to add more than 1 or 2 users to Membrain during the testing phase of the integration setup. When you are confident the sync is functioning as expected, add more users then.
Single Sign-on Setup
This section allows you to configure Single Signon for your Salesforce users.
Stages
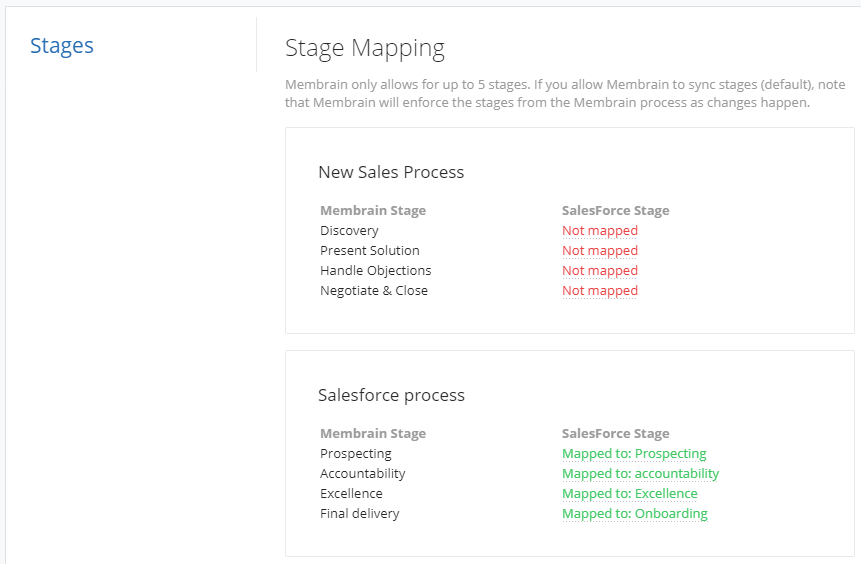
This section is where the mapping of the relevant stages between Salesforce and Membrain is configured and is a crucial part of the setup. Membrain Stages don't work the same way Salesforce Stages do - see the table below for an overview.
Important considerations
Here are some important points to consider while you are configuring the Stages section:
- Membrain stages should only be mapped to the stages in Salesforce with StageType = Open
- Membrain will use Stages with Stage Type ClosedWon and ClosedLost as Won or Archived Statuses
| Membrain Status |
Salesforce Stage |
| Open (Stage Name) |
Open (Stage Name)
|
| Won |
Stage Name (with Stage Type = ClosedWon) |
| Archived (Lost) |
Stage Name (with Stage Type = ClosedLost) |
Other considerations
- Membrain supports a maximum of 5 stages. If your salesforce environment has more than 5 stages, there could be issues with the sync and probability settings, as probability is based on Stages. In this case, it is recommended to disable 2-way sync of Stages. - From Salesforce to Membrain, done from the Status area.
- Stage names do not need to be identical to map successfully.
Win/Loss Reasons
In Membrain, Win/Loss reasons must be configured to include the Salesforce equivalent, which is the Stage name of the Stages which have a Stage Type of ClosedWon and ClosedLost.
Record Types & Processes
Record Types are similar to Sales Processes in Membrain and are a crucial part of the setup.
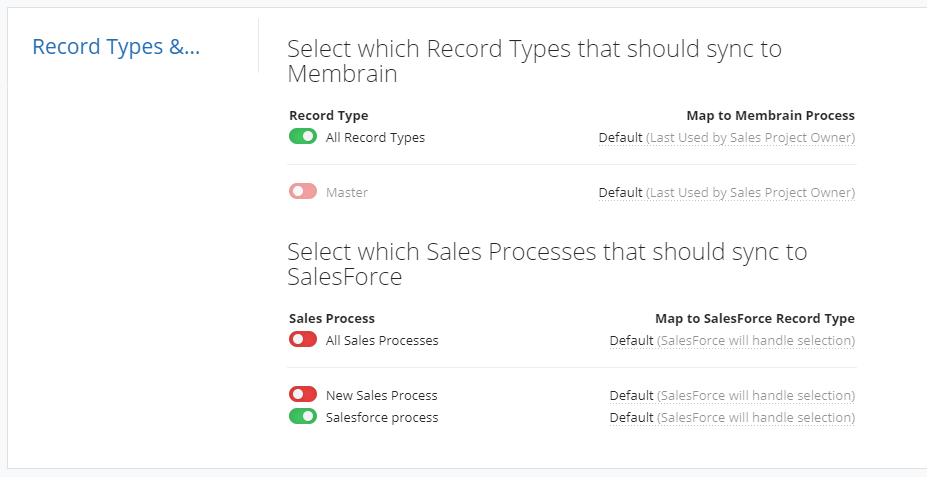
Sync Types
There are two types of syncs to choose from - Full Sync and Opportunity Sync.
- Full Sync
The full sync option syncs information related to Accounts, Contacts, Opportunities, and Activities from Salesforce to Membrain and vice versa.
- Opportunity Sync
The opportunity sync option syncs Opportunities, and only the Accounts, Contacts, and Activities that are related to those synced Opportunities. This means Accounts, Contacts, Activities that are not connected to an Opportunity will not be included in the sync and will be skipped during syncing.

Properties
This section is where you can include additional Properties or Custom fields to sync between Salesforce and Membrain for Opportunities, Accounts, and Contacts.
There are default fields that sync automatically for these 3 items and are described below:
Opportunity Fields
The following Salesforce Opportunity fields are synced automatically by default and are required for the sync to run successfully: Opportunity Name, Stage, Amount, Next Step, Account, Owner, Probability, and Closing Date.
Account Fields
The following Salesforce Account fields are synced automatically by default: Account Name, Parent Account Name, Owner, Phone, Website, Description, Billing Address, and Shipping Address.
Contact Fields
The following Salesforce Contact fields are synced automatically by default: Name, Phone, Mobile Phone, Title, and Email.
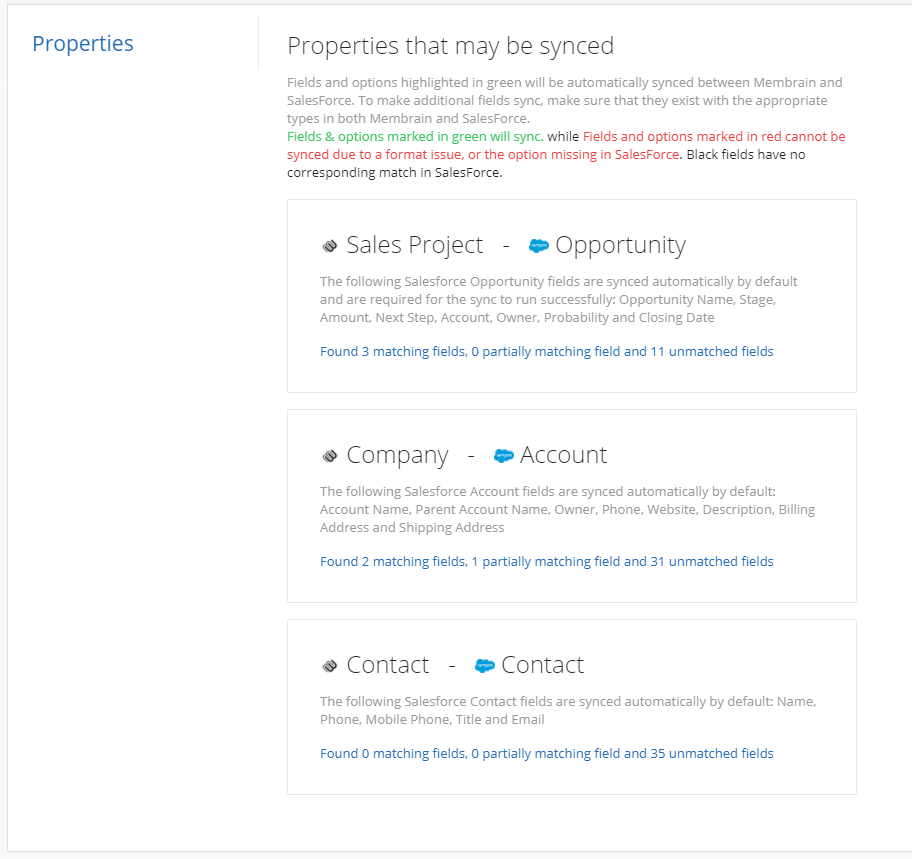
Adding additional properties/custom fields to the integration
To map fields from Salesforce to Membrain, click on the Blue text "Found n matching fields, n partially matching fields and n unmatched fields".
Testing the integration
Testing the integration should be done in repeated cycles, and with data verification on both sides completed after each test.
The test will sync up to 25 items during one Sync Round, giving you a set of data to test and verify
Here are some best practice steps to test the integration in a thorough, structured way.
- First, confirm everything in the setup looks accurate and as complete as possible
- Ensure there is only 1 active salesperson's user account in both Membrain and Salesforce. This will allow you to test a small sample of opportunities - those that the salesperson is the owner of. You will add more users when initial tests prove successful.
A Test in Full Mode will sync 25 Opps (plus related companies/contacts, etc) PLUS 25 additional Companies PLUS 25 additional contacts.
Begin testing
- Go to the Service tab and choose which Sync Type you would like to use
- Only Related to Opportunity - syncs Opportunities along with ONLY Accounts, Contact, and Activities related to those opportunities.
- Full Sync - syncs Opportunities and All Accounts, Contacts, and Activities, even those that are not related to Opportunities. Full Sync - All Accounts regardless of whether it is connected to an opportunity or Not.
- Go to the "Status" tab in the integration setup page in Membrain.
- Change the dates from which you want the integration to start fetching data. It will fetch data from the most recently edited Opportunities. These dates can be changed later as long as the integration service is not actively running.
- Go back to the "Service" tab and click "Test run". This will push a sync-up to 25 Opportunities, as well as any related Accounts, Opportunity Contacts, and Opportunities Activities without fully starting the integration.
- Wait until the test button becomes available again. The test is then complete.
- Review the data in Salesforce to confirm everything looks good. You may need to create a "view" that shows recently changed objects in Salesforce to review activities, accounts, contacts, and opportunities. Confirm that key information such as account names, opportunity names, values, closing dates, open stages, closed stages, any data you have set up to be synced all looks good.
- Review the data in Membrain to confirm everything looks good as well.
- Repeat the "test run" process as many times as needed, until you are confident the setup is correct and there are no issues.
- During this process, you can add more users to sync between the Salesforce and Membrain environments, and continue to use the "test run" in a controlled way.
- Another tool at your disposal to test this is to gradually move the dates in the "Status" tab back in time to get a bigger and bigger dataset to verify this with for each time you push the "Test run" button.
Moving from Sandbox to Live Environment
- If this is all done in a sandbox environment, you will need to recreate these steps in the live environment before enabling the full service.
- When you have full confidence that everything seems to be in order, it's time to start the roll-out.
The Roll-out Process
- Ensure all the users are added to Membrain - Learn how to add Salesforce users to Membrain.
- Start the sync by clicking on the Enable Sync button.
- The first sync can take a significant amount of time (occasionally days) before it's completely caught up to the data in Salesforce. When it is, all the lights in the "Status" tab for the different data types will be green and the date and time next to it will be close to current, with only a few minutes behind.


