Popular Content
Membrain for:
Unlocking the full potential of Membrain involves not only seamless import capabilities but also effortless export functionality. Whether you require in-depth analysis beyond the Membrain platform, seek to leverage your data in alternative environments, or are transitioning away from Membrain and wish to retain your pertinent information, rest assured that we don't withhold any of your data. Exporting data from Membrain is a straightforward process, ensuring your data remains accessible and adaptable to your evolving needs.
All data created within Membrain can be exported from the system. This includes a comprehensive range of information, ensuring that you have the flexibility to manage and utilize your data outside the Membrain platform.
Documents and images that were created externally and subsequently uploaded to Membrain must be downloaded individually from either your Document List or the specific location where they were initially uploaded. Ensuring you have a local copy of each file provides continued accessibility and control over your valuable content.
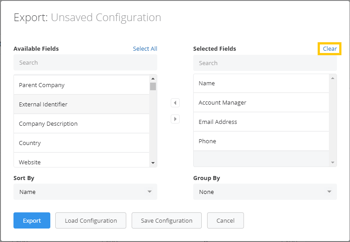
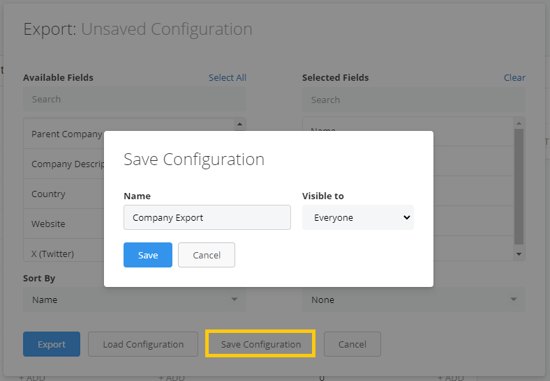
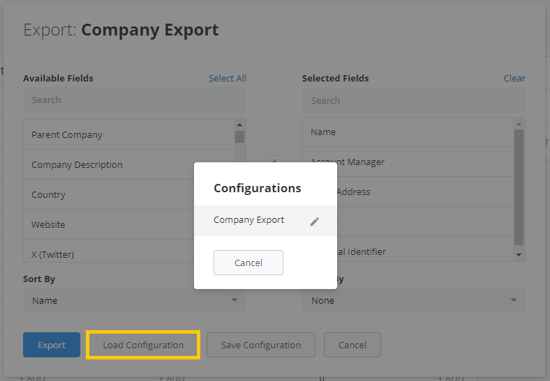
You will find an Export option in any list view in Membrain where your data is stored. From the Company list to your Dashboards. Simply go to the location of the items you want to export, click on the Actions ![]() button at the top right of your screen, and choose Export (the Export option is only visible if you have the appropriate permissions).
button at the top right of your screen, and choose Export (the Export option is only visible if you have the appropriate permissions).
If you want to export Companies— click on the Actions button from your CRM > Companies list view and choose Export.
To export Contacts— click on the Actions button from your CRM > Contacts list view and choose Export, and so on.

Please follow the comprehensive step-by-step guide provided below:
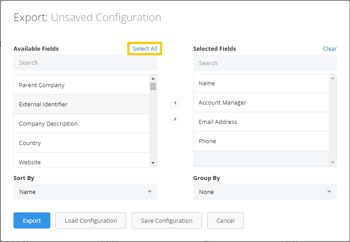
First, go to the list view of your choice and add or remove filters based on your requirements
After doing so, navigate to the Actions menu on the top-right of the page and click on Export


The procedure to export Dashboard Graphs and Processes is a little different from the List Exports but no more complicated.
There are two ways to Export your Dashboards:
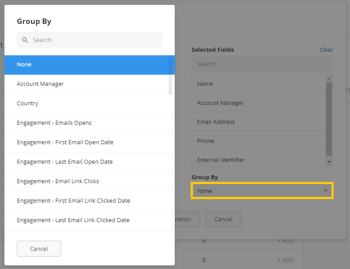
Export Data to Excel—When picking this option you get all your graphs in that Dashboard as separate sheets in an .xlsx file. All graph types will be transformed into lists of data. This data can then off course be remade into and viewed as Graphs inside your spreadsheet program.
Export to PDF—If you want to Export your Dashboards keeping your graphs the way you configured them inside Membrain you can Export to PDF instead. The PDF-file will show your graphs as images inside the document. Any details about the graphs will not be shown, such as related Company, Project, Owner and so forth unless they are visible in the individual graph legends. Read more about Dashboards here.
You can also share your Dashboards outside Membrain without having to Export them, simply by creating a Live Dashboard. Read more about this feature here.
To ensure that you can manage your workflows with ease, exporting processes is streamlined within Membrain. Whether you're looking to backup your processes, share workflows with colleagues, or transfer configurations to another environment, the process is straightforward.
Follow these step-by-step instructions:


