Applying Rules to a Process is a great way to help you stay on top of what's important, keep the momentum up, and ensure your Prospects and Projects are in a healthy state.
For example, you may want to:
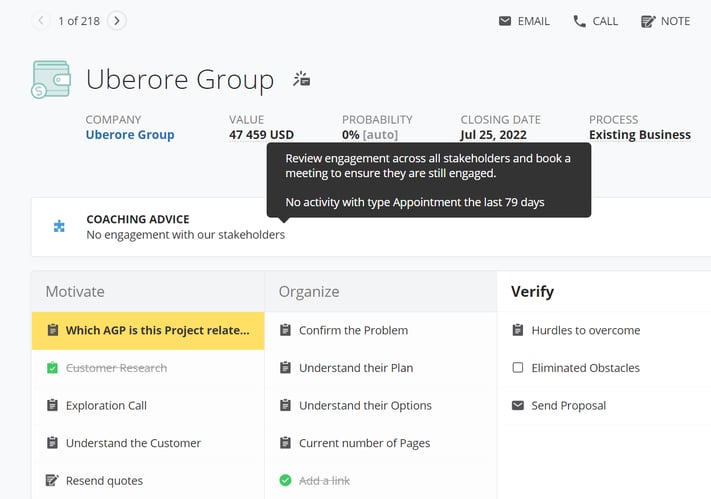
Once configured, alerts will trigger in the form of blue puzzle pieces, yellow flags and red flags throughout your Membrain instance. They'll help you prioritize your efforts and focus on Prospects, Sales Projects or Account Growth Projects that require more attention.
Rules can alert you in various ways:
There are 4 different Health Statuses that a Project can have, based on the rules that are configured. Of course, if no icon is shown, then the Project is Healthy.
![]() Blue Puzzle Piece - coaching advice indicates that there is something that needs to be addressed, even if it is not yet urgent.
Blue Puzzle Piece - coaching advice indicates that there is something that needs to be addressed, even if it is not yet urgent.
![]() Yellow flags mean that quick action is required to address the problem at hand.
Yellow flags mean that quick action is required to address the problem at hand.
![]() The final level is the red flag – a serious warning that should not be ignored. Something very important has been missed that could impact the success of a Project.
The final level is the red flag – a serious warning that should not be ignored. Something very important has been missed that could impact the success of a Project.
Configure Lists using filters, sorting, and grouping, which will help you work through your Projects in the order of their importance.
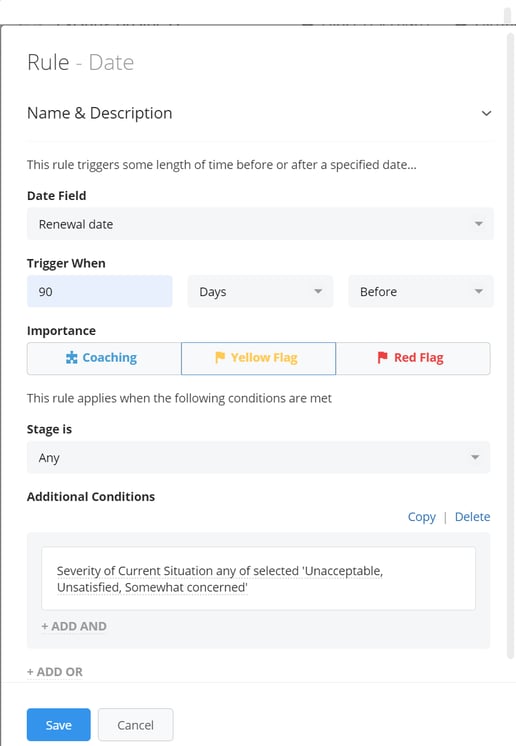
Rules and their importance are set up by your Membrain Administrator and are applied in the Process Editor. Upon creation, you'll be given the option to apply a name and description to your rule for easy reference (see below for an example of what this might look like)
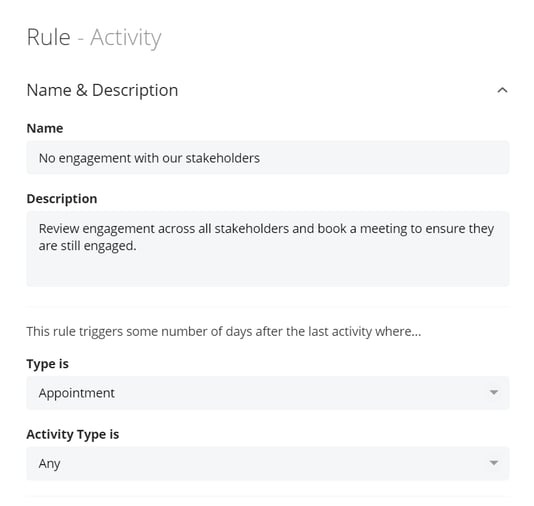
Rules can be set to trigger based on the following criteria:
If you want to get even more specific, you can create Rules that reference not just any activity, but the type of activity. For example, was it a First Meeting or a Customer Review, was it an Exploration Phone Call or a Customer Assist Phone Call. These different Custom Activity Types can be added to match your team's workflow; learn more about this through Managing Activity Types.
For easy setup, some important options have been predefined, with an editable number of days before being triggered - to give you full control. The intensity of the rule increases based on the time you configure during the rule setup. For example, start the alert with a puzzle piece, after x amount of days increases to a yellow flag, and after X amount of days increases again to a red flag.
The time frames for these predefined rules can be edited:

You can duplicate any Rule directly from the Rules List by clicking the copy icon to the right of the Rule you wish to duplicate. This opens a new dialog with a copy of the selected Rule, where the name includes “(Copy)” as a suffix. All settings such as Description, Conditions, Importance Levels, and Time Span are preserved, and the copied Rule functions exactly like the original, triggering warnings based on its configuration. After copying, update your Process draft and click Publish to apply updates. Copied Rules are fully supported in export and import processes.


Here are some examples of ways you could set up Rules for your Process. They can be applied to Prospecting Processes, Sales Processes, and Account Growth Processes. Examples 1 and 2 are basic rules, example 3 is more advanced, whereas examples 4, 5 and 6 are more complex rules.
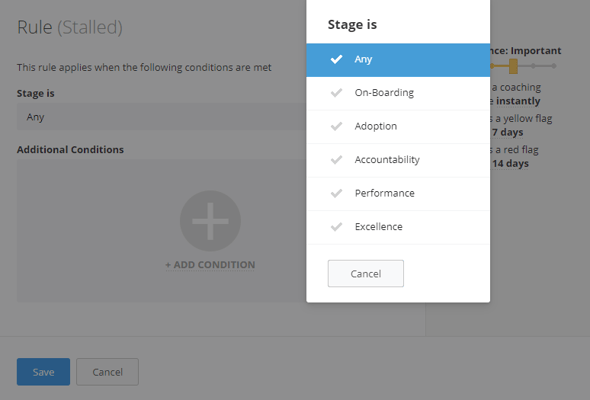
Stalling with no progress means that STEPS haven't been completed in the project, even if there's been activity. For this example, you want to highlight Sales Projects that stall for more than 21 days in the final two stages of our Sales Process.
To suit your team, you want this to generate a blue puzzle piece after 14 days and a yellow flag after 21 days
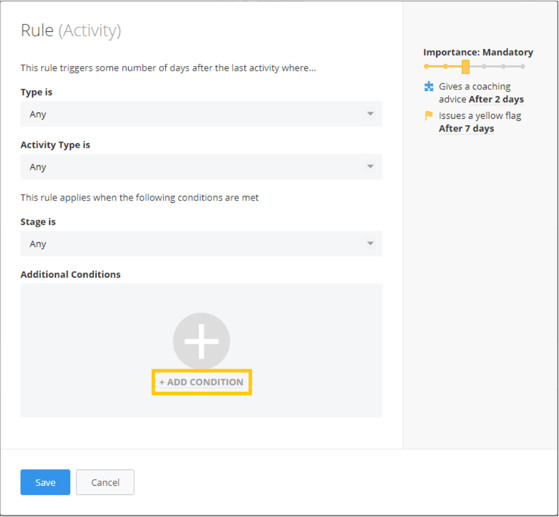
You want to highlight Sales Projects that have had no activity after a certain time span. No activity relates to no emails sent, no notes recorded, no appointments made, etc.
To suit your workflow, you have decided that you would like this to generate a blue puzzle piece after 7 days and a yellow flag after 14 days. You want this to apply to all stages.
For Prospecting you might want to have a shorter time between creation and a follow-up with a first activity.
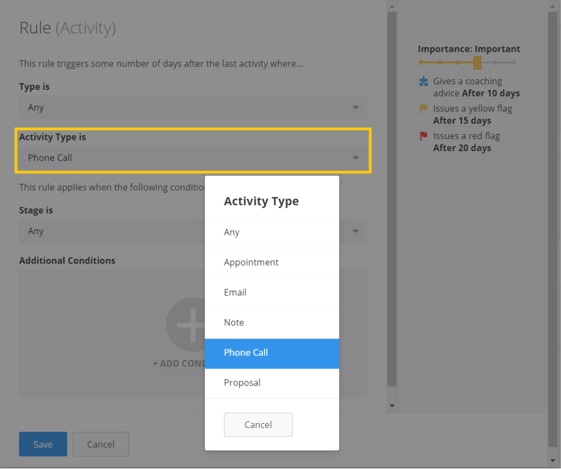
You want to call attention to Account Growth Projects that have had no Phone Calls after a certain time span. Phone Call in this scenario only relates to the Activity Type, meaning that you can use Call, Task, Note, etc. to log this activity, as long as the Activity Type is set as a Phone Call.
To suit your workflow, you have decided that you would like this to generate a blue puzzle piece after 10 days, a yellow flag after 15 days, and a red flag after 20 days. You want this to apply to all stages.
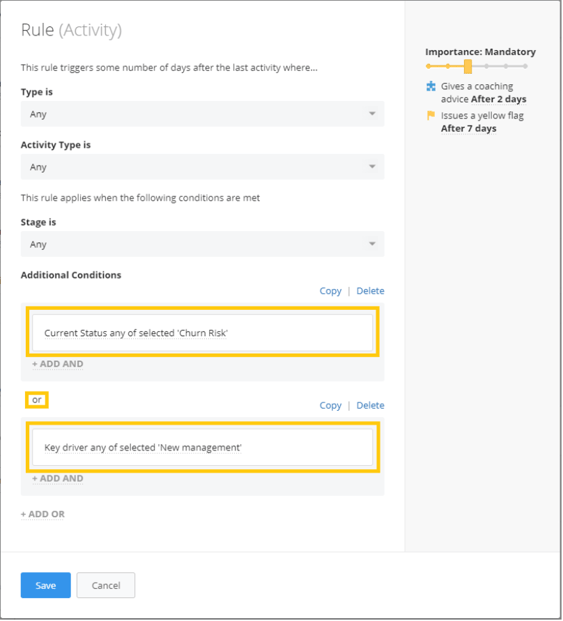
Conditional rules enable you to prioritize your efforts, and base alerts on criteria you've decided is relevant to your business.
As an example, you want to highlight Sales Projects that are at Churn Risk OR those that are going through Management Changes to determine mitigation steps to take, In this example, the rule applies when either of the conditions is met.
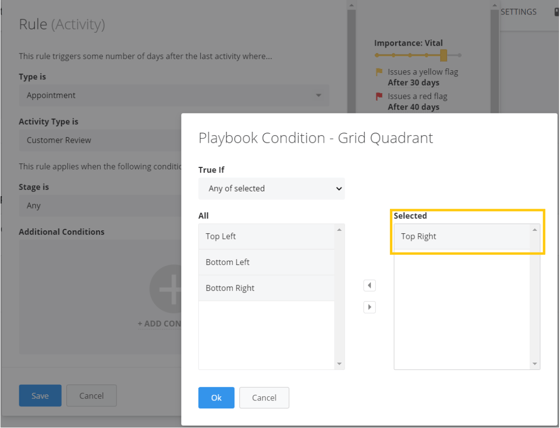
The Rule applies when the Type is Appointment and the Activity Type is Customer Review.
You have decided that you would like this to generate a yellow flag after 30 days and a red flag after 40 days. You want this to apply to all stages.
Adding date fields to your process can help you keep on top of your calendar, and adding rules based on those dates will ensure you never miss a deadline.
In this example, you want to alert members of your team to an impending contract renewal, and give customers plenty of time to ask clarifying questions. Based on your renewal process, you've decided to create a rule that will generate a red flag one day before the auto-renewal kicks in, and as an extra reminder, an additional rule that sends a yellow flag 90 days out, but only if the customer has given you reason for concern.
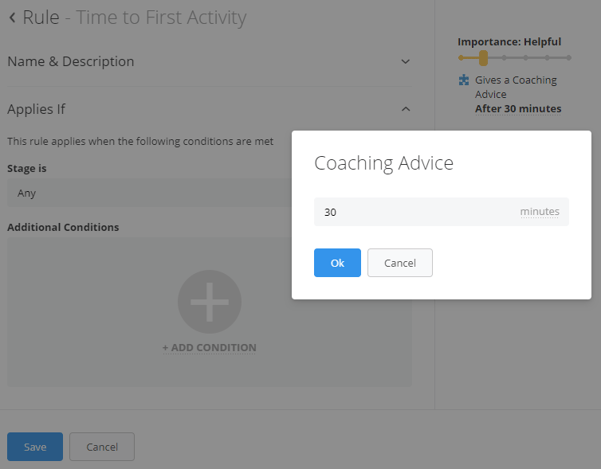
There are two additional options of Rules that are only available to Prospecting and Ticket Processes, Time to First Activity and Not Assigned (the latter is also available in Flow Processes though).
We want to add a rule that all new tickets should receive a first response within 2 hours.
Depending on your Process Settings, there may be a countdown clock of 14 days visible. If this happens you will have 14 days to address the problem or walk away from the opportunity. After the 14 days are up, the Sales Project will be automatically archived. However, it can be brought back into your pipeline at any time simply by reactivating the project. To learn more about auto-archiving, read this article here.
In the Active Pipeline, Sales Projects with red flags show as a solid red color, so it's even easier to see where your efforts should be focused. If a Project has a red flag, it is considered unhealthy and shows as a solid red-colored background in the Active Pipeline. These Sales projects with red flag warnings are no longer included in your forecast or your weighted pipeline.


